15 Mud Kitchen Accessories for Fun Messy Play
If you have been thinking about building a mud kitchen for your little ones, this guide to mud kitchen accessories messy play ideas is for you — the right extras turn a few old pallets into a magical outdoor world. A mud kitchen is simply an outdoor play kitchen — usually built from pallets or reclaimed timber — where children mix, pour, stir and bake with mud, water, sand, leaves and petals. It is one of the cheapest, happiest garden projects you can make, keeping children busy for hours while building creativity, motor skills and confidence. From stainless steel bowls and working taps to chalkboard menus and potion corners, the right extras turn simple messy play into rich, imaginative learning. Here are 15 mud kitchen accessory ideas that are practical, affordable and genuinely loved by children — plus tips on sourcing them cheaply and keeping the chaos (mostly) contained. Let’s dig in!
1. Start With a Sturdy Wooden Pallet Base
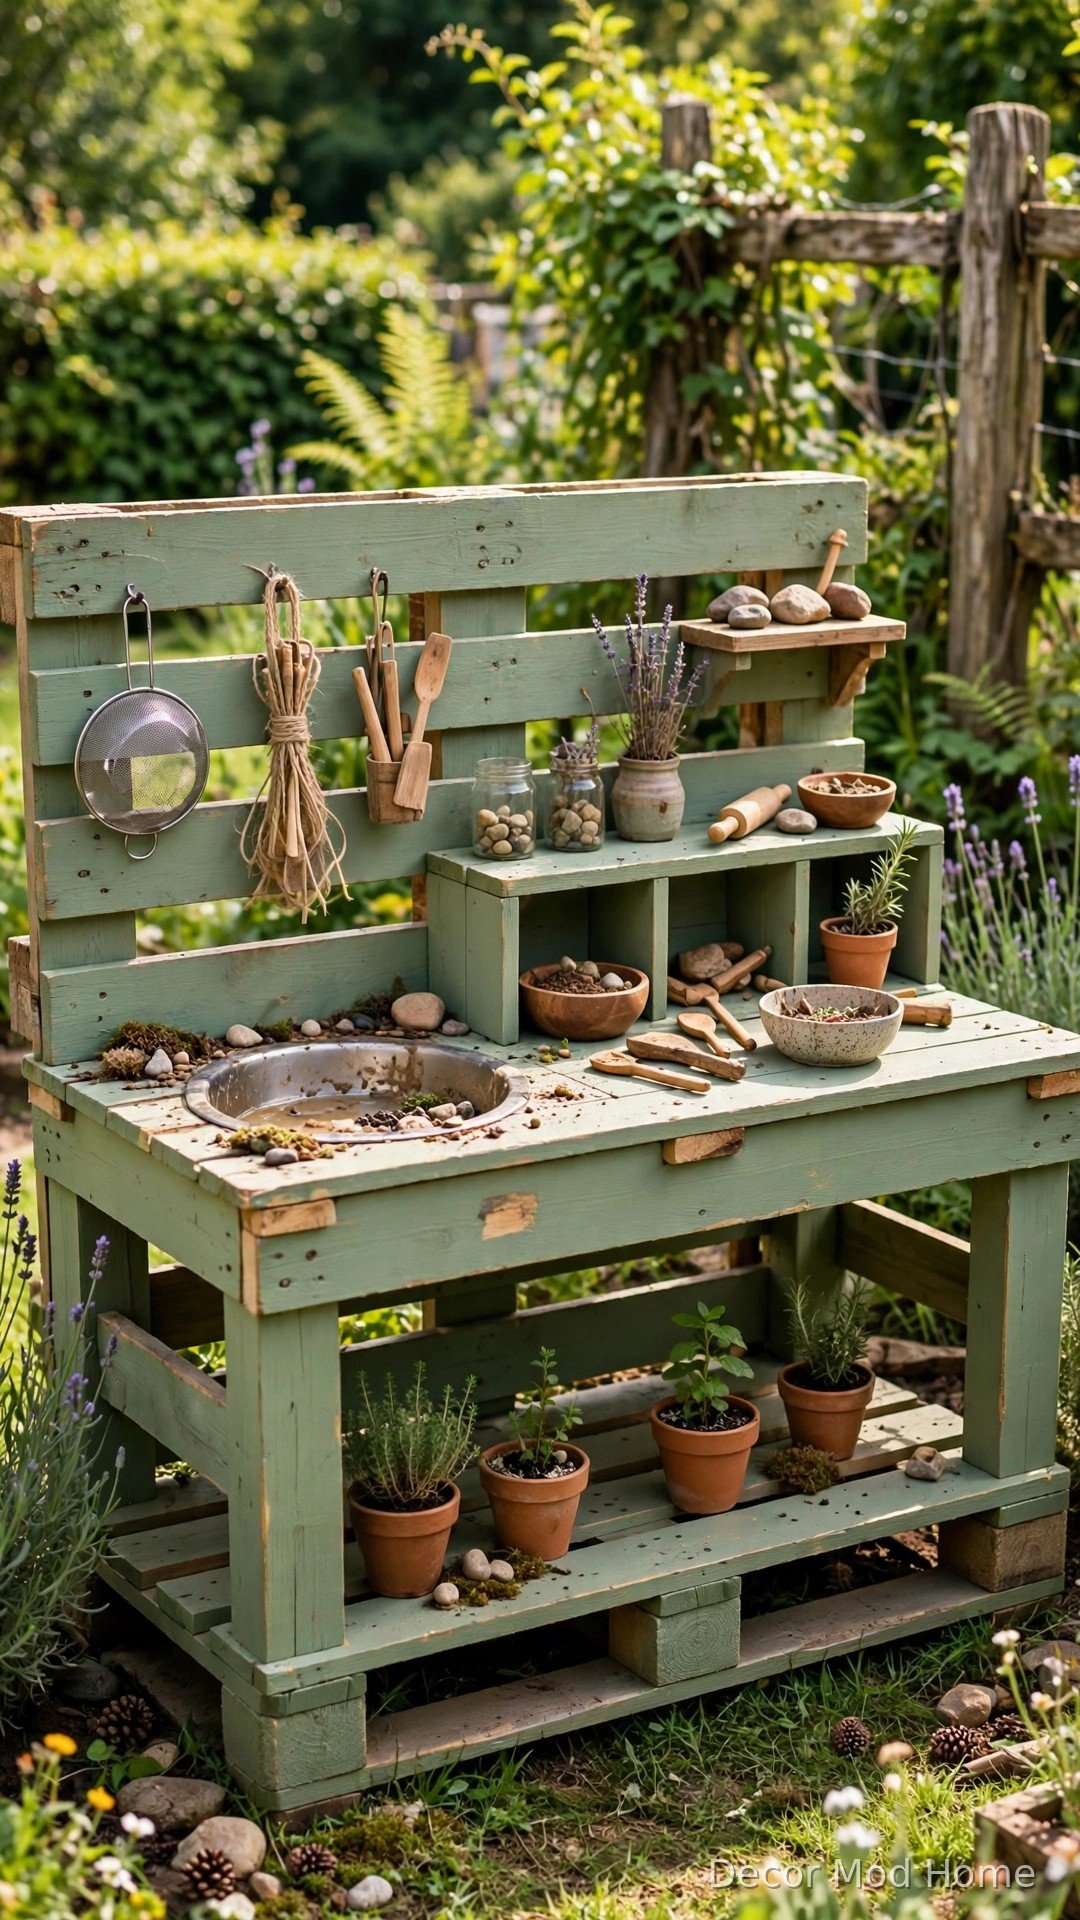
Every great mud kitchen begins with a solid, steady worktop, and wooden pallets are the classic choice — they are free or cheap, wonderfully rustic, and the perfect child height when stacked or stood on end. Look for heat-treated pallets (marked HT), give them a good scrub, and sand down any splinters before little hands get to work. Screw two pallets together for a generous L-shaped counter, or mount a single pallet top onto four chunky legs for a simple bench-style kitchen. A quick coat of exterior wood paint or stain will help it survive the rain, and a cheerful colour like sage green instantly makes the whole setup feel like a proper little café. Keep the worktop around 50–60cm high so toddlers and preschoolers can stir and pour comfortably.
2. Add Stainless Steel Bowls, Jugs and Pots
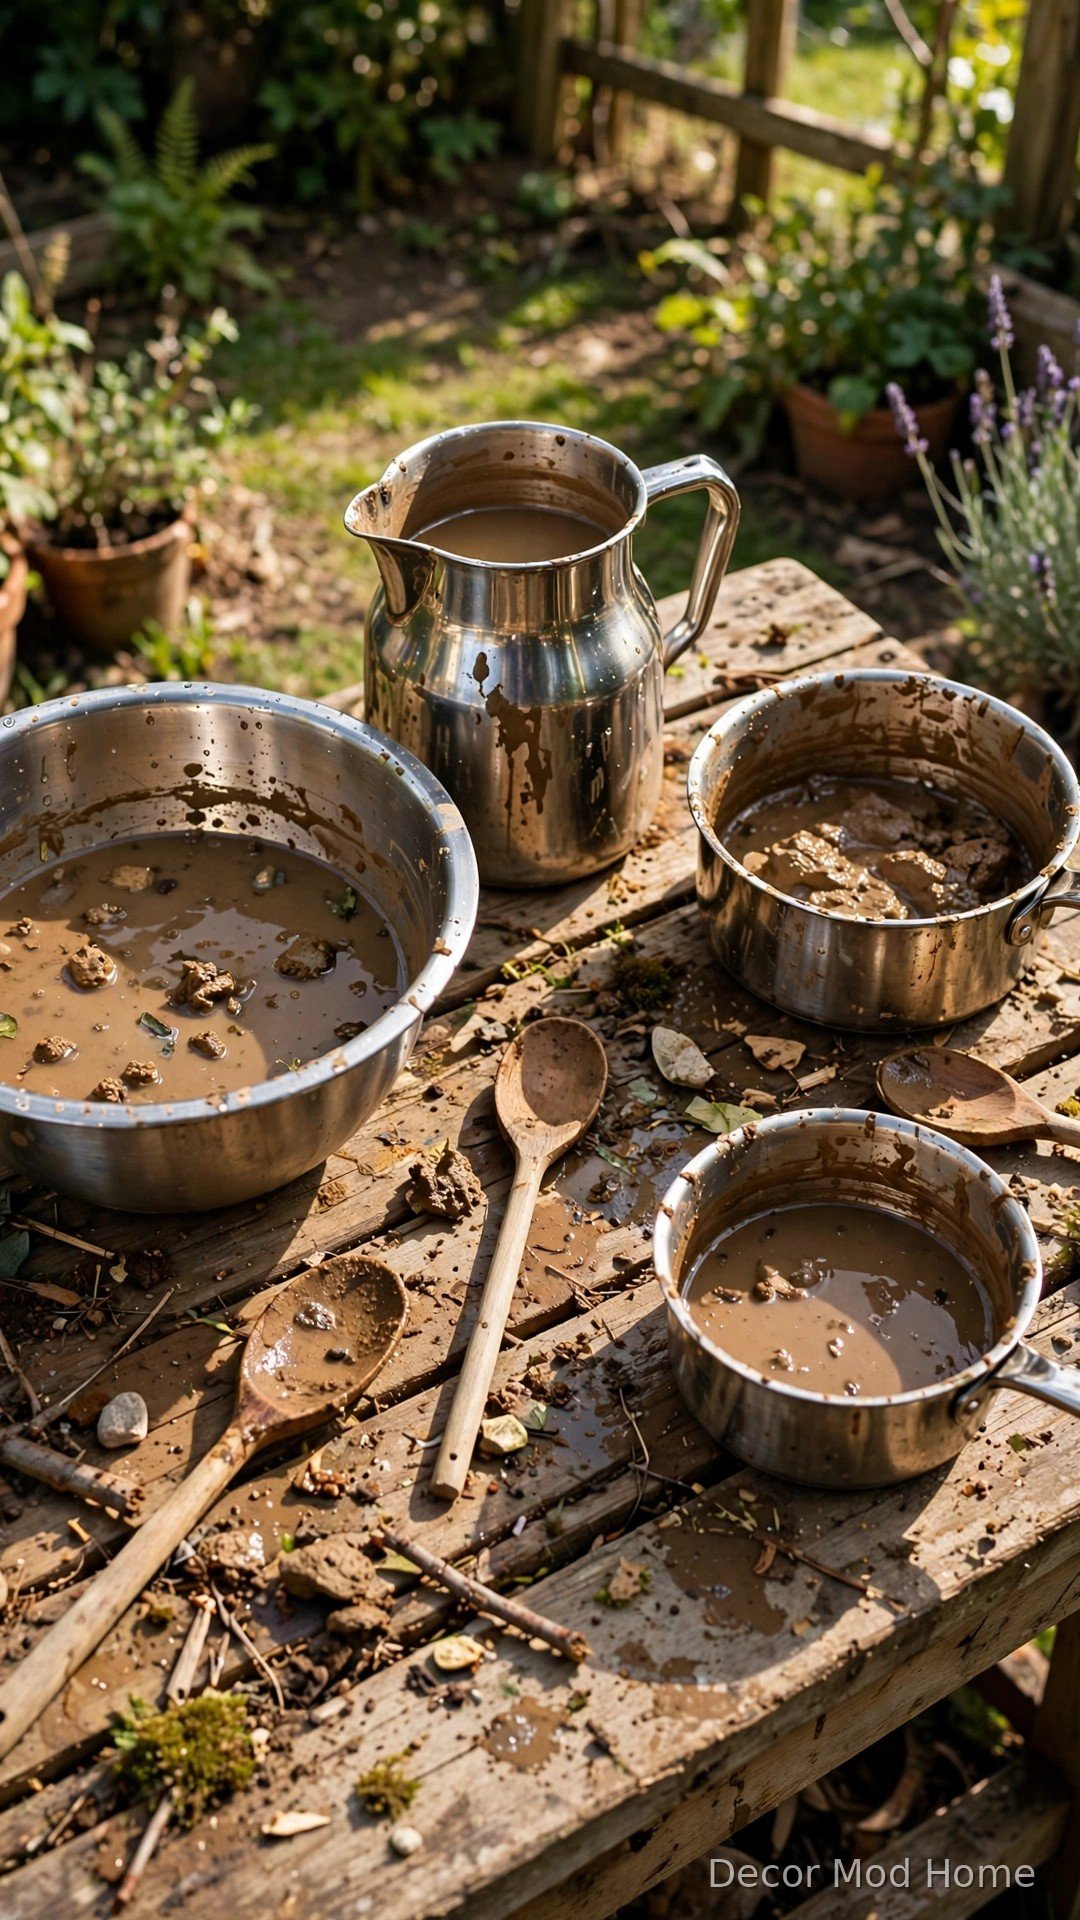
No mud kitchen is complete without a good collection of stainless steel bowls, jugs and saucepans — they are practically indestructible, easy to rinse clean, and they look wonderfully “real” in small hands. Charity shops, car boot sales and pound shops are treasure troves for dented mixing bowls, old measuring jugs and retired saucepans that are perfect for mud pies and petal soup. Choose a mix of sizes, from tiny ramekins for “spices” to big washing-up bowls for enthusiastic mixing. The satisfying clatter of a metal spoon against a steel bowl is half the fun, and unlike plastic these will not crack in the frost or fade in the sun. Avoid anything with sharp edges or non-stick coatings that could flake, and retire any piece that gets properly rusty.
3. Set Up a Gravity-Fed Water Supply

Water is the secret ingredient that turns dry dirt into glorious mud, so a simple, child-friendly water supply is one of the most useful mud kitchen accessories you can add. A small water butt on a stand with a tap at the bottom gives children independent access to water without you trailing a hose across the garden — gravity does all the work. Position it beside the kitchen where little arms can reach, and show them how to fill jugs a little at a time. If a water butt feels like overkill, a large bucket with a ladle or an old drinks dispenser with a push tap works beautifully too. Teach the “little and often” rule so the mud stays gloriously gloopy rather than soupy.
4. Stock Up on Wooden Spoons and Spatulas
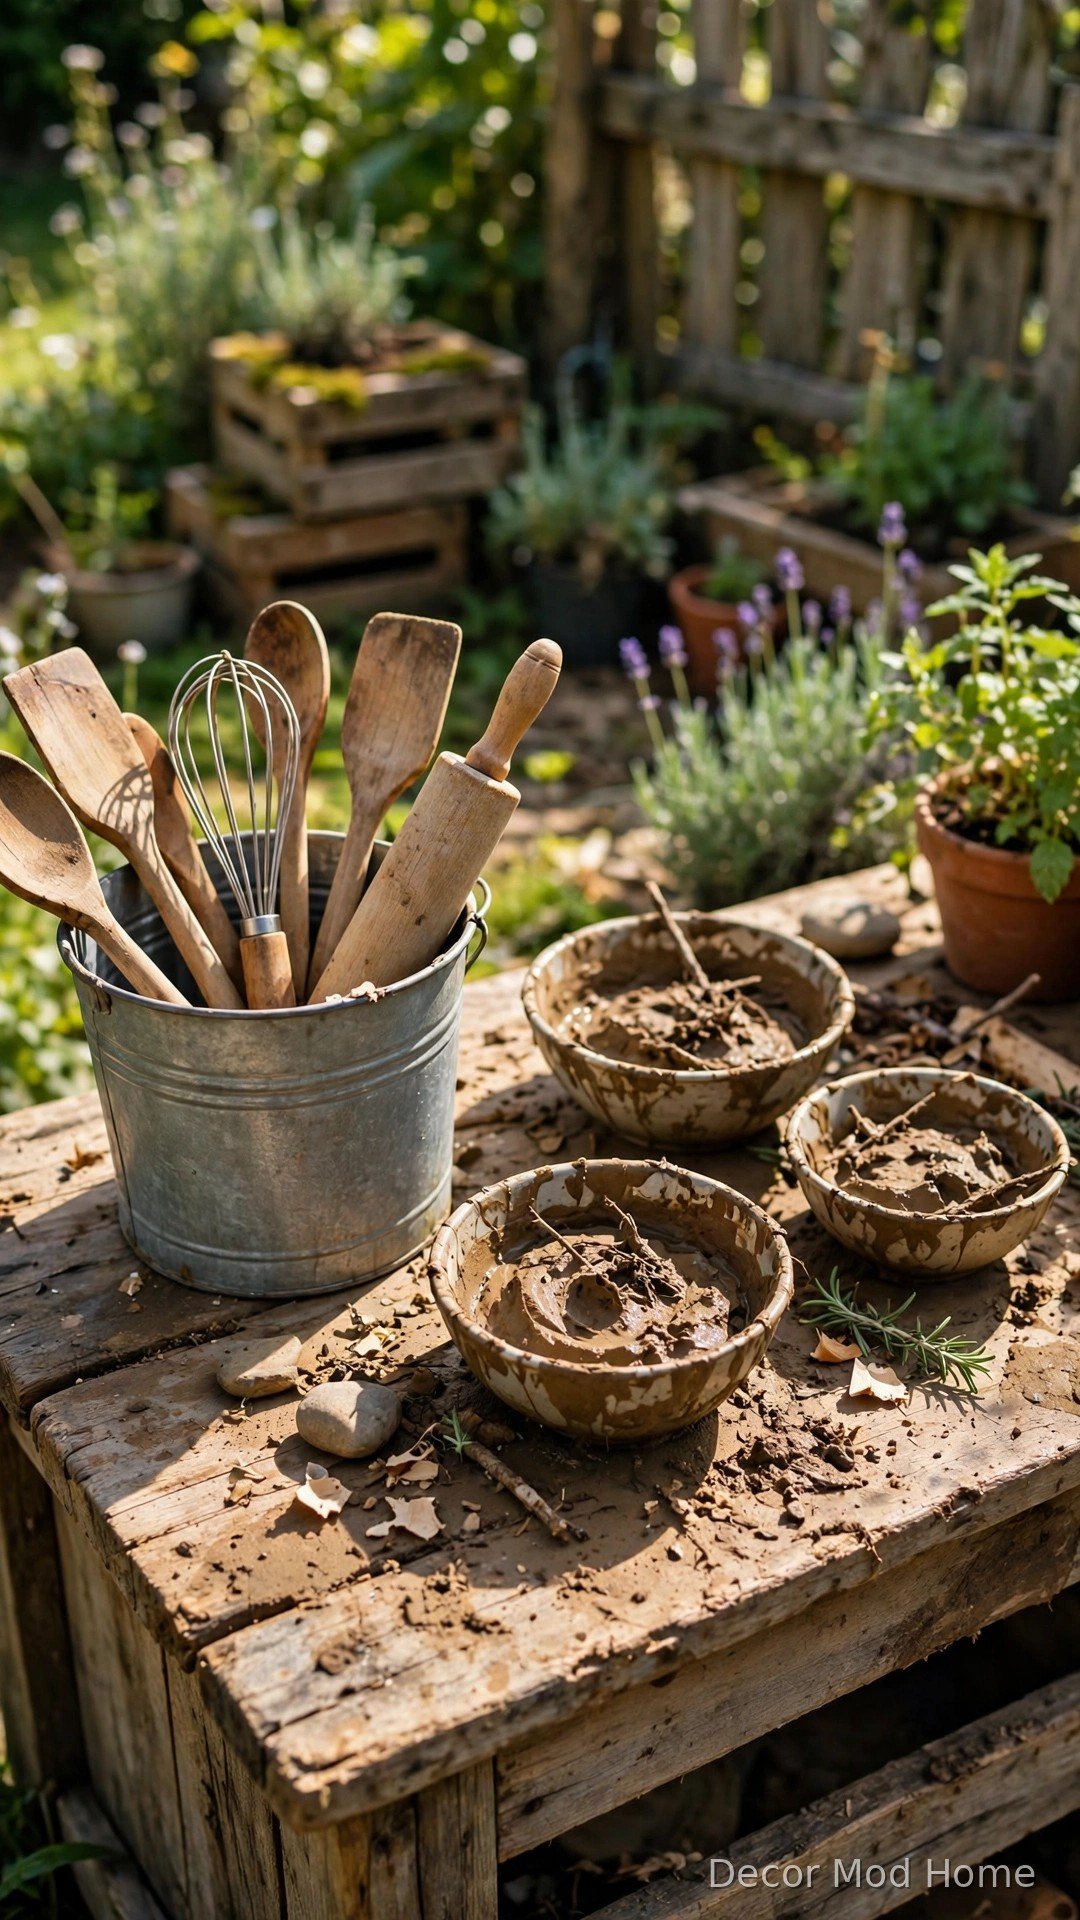
Every chef needs tools, and a bundle of wooden spoons, spatulas and rolling pins is essential for serious mud kitchen cooking. Wooden utensils are ideal because they are sturdy enough to stir thick mud, comfortable for small hands to grip, and they develop a lovely weathered patina that only adds to the charm. Raid charity shops for second-hand wooden spoons, or buy an inexpensive multipack and keep a few spares. Add a whisk for frothy “cappuccinos”, a potato masher for squashing mud pies, and a couple of pastry brushes for delicate decorating work. Stand them in an old tin or plant pot so they are always within reach.
5. Create a Dedicated Mud Pie Baking Station
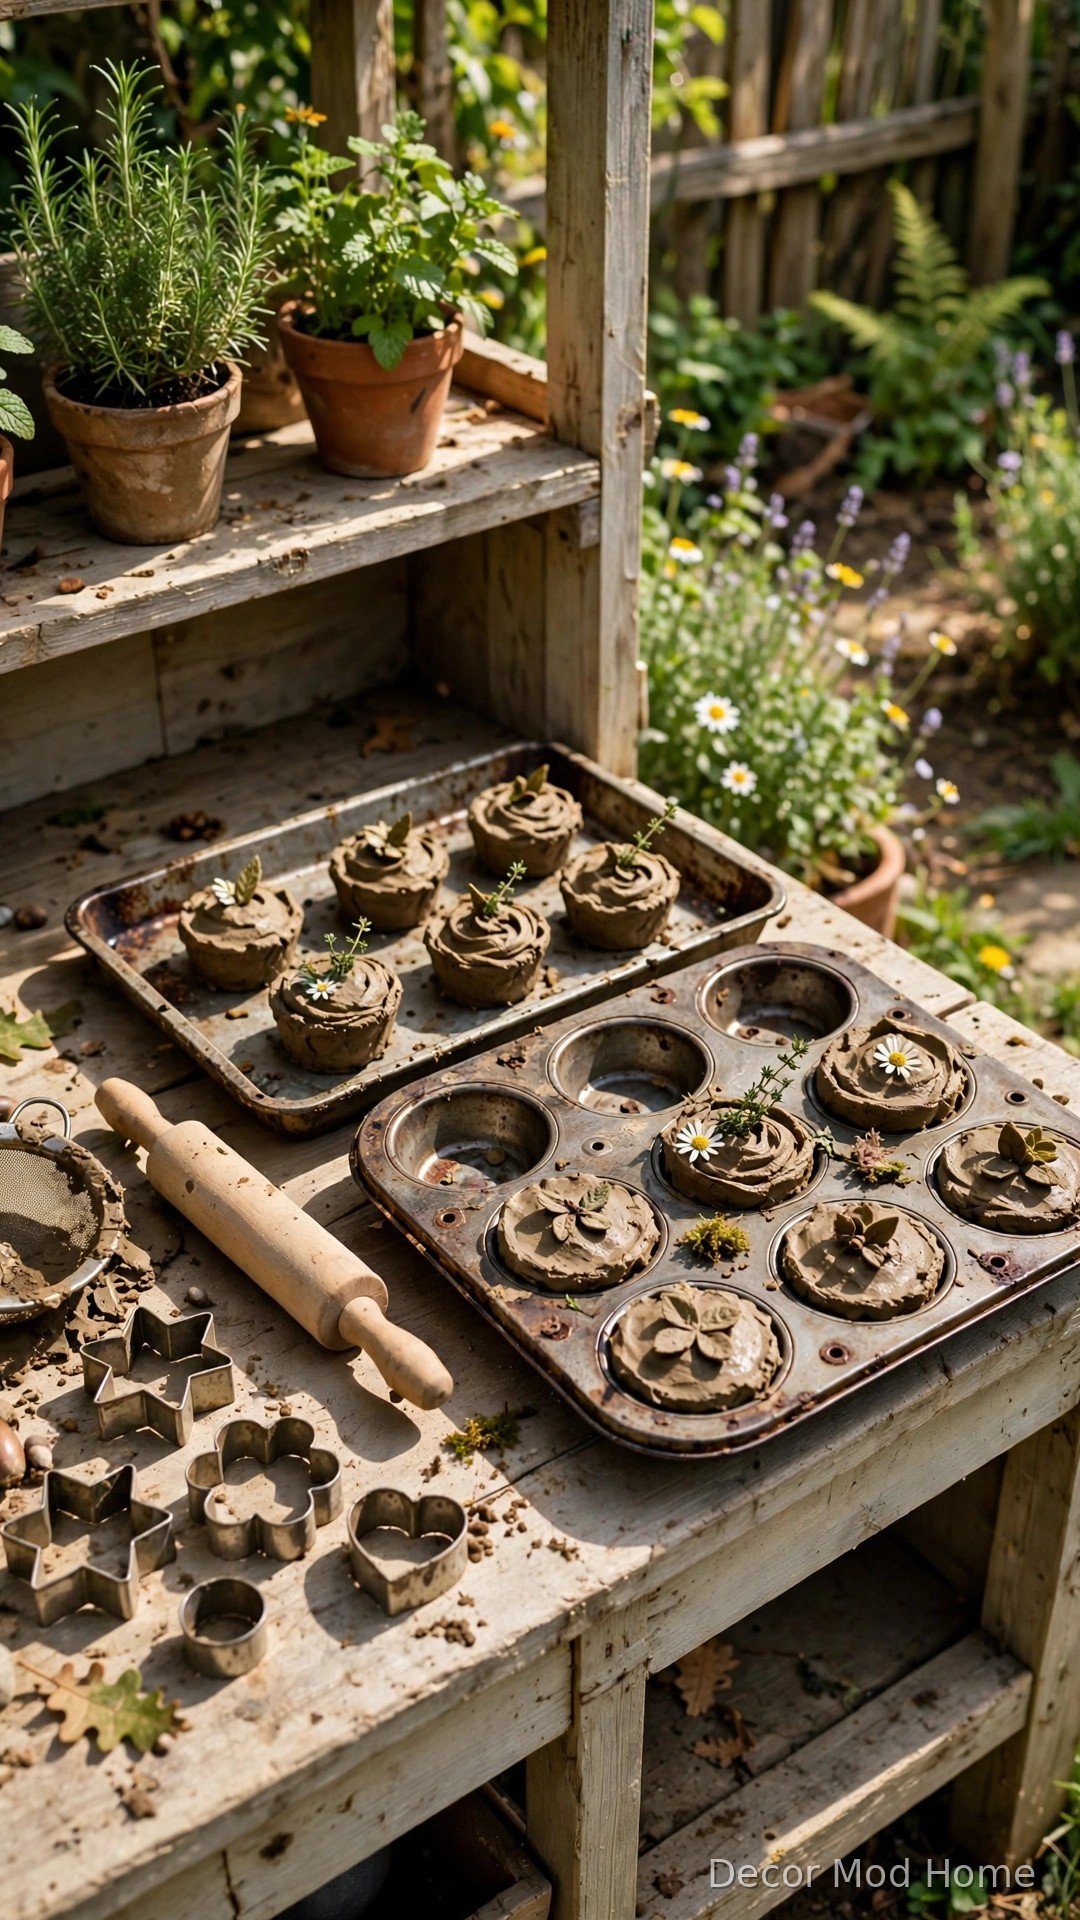
Give your little bakers their own patisserie corner with a dedicated mud pie baking station, and watch their imaginations run wild. An old muffin tin, a couple of dented baking trays and some silicone cupcake cases are all you need for pressing, smoothing and turning out perfect little “cakes”. Add a cooling rack (an old oven shelf is ideal) so finished bakes can be displayed with pride, and a rolling pin plus a few biscuit cutters for shaping creations. A small chalkboard sign reading “Today’s Specials” makes it feel like a real bakery. This is also a lovely way to sneak in maths: counting spoonfuls, comparing sizes and talking about full, half-full and empty tins.
6. Fit a Sink With a Working Hand Pump
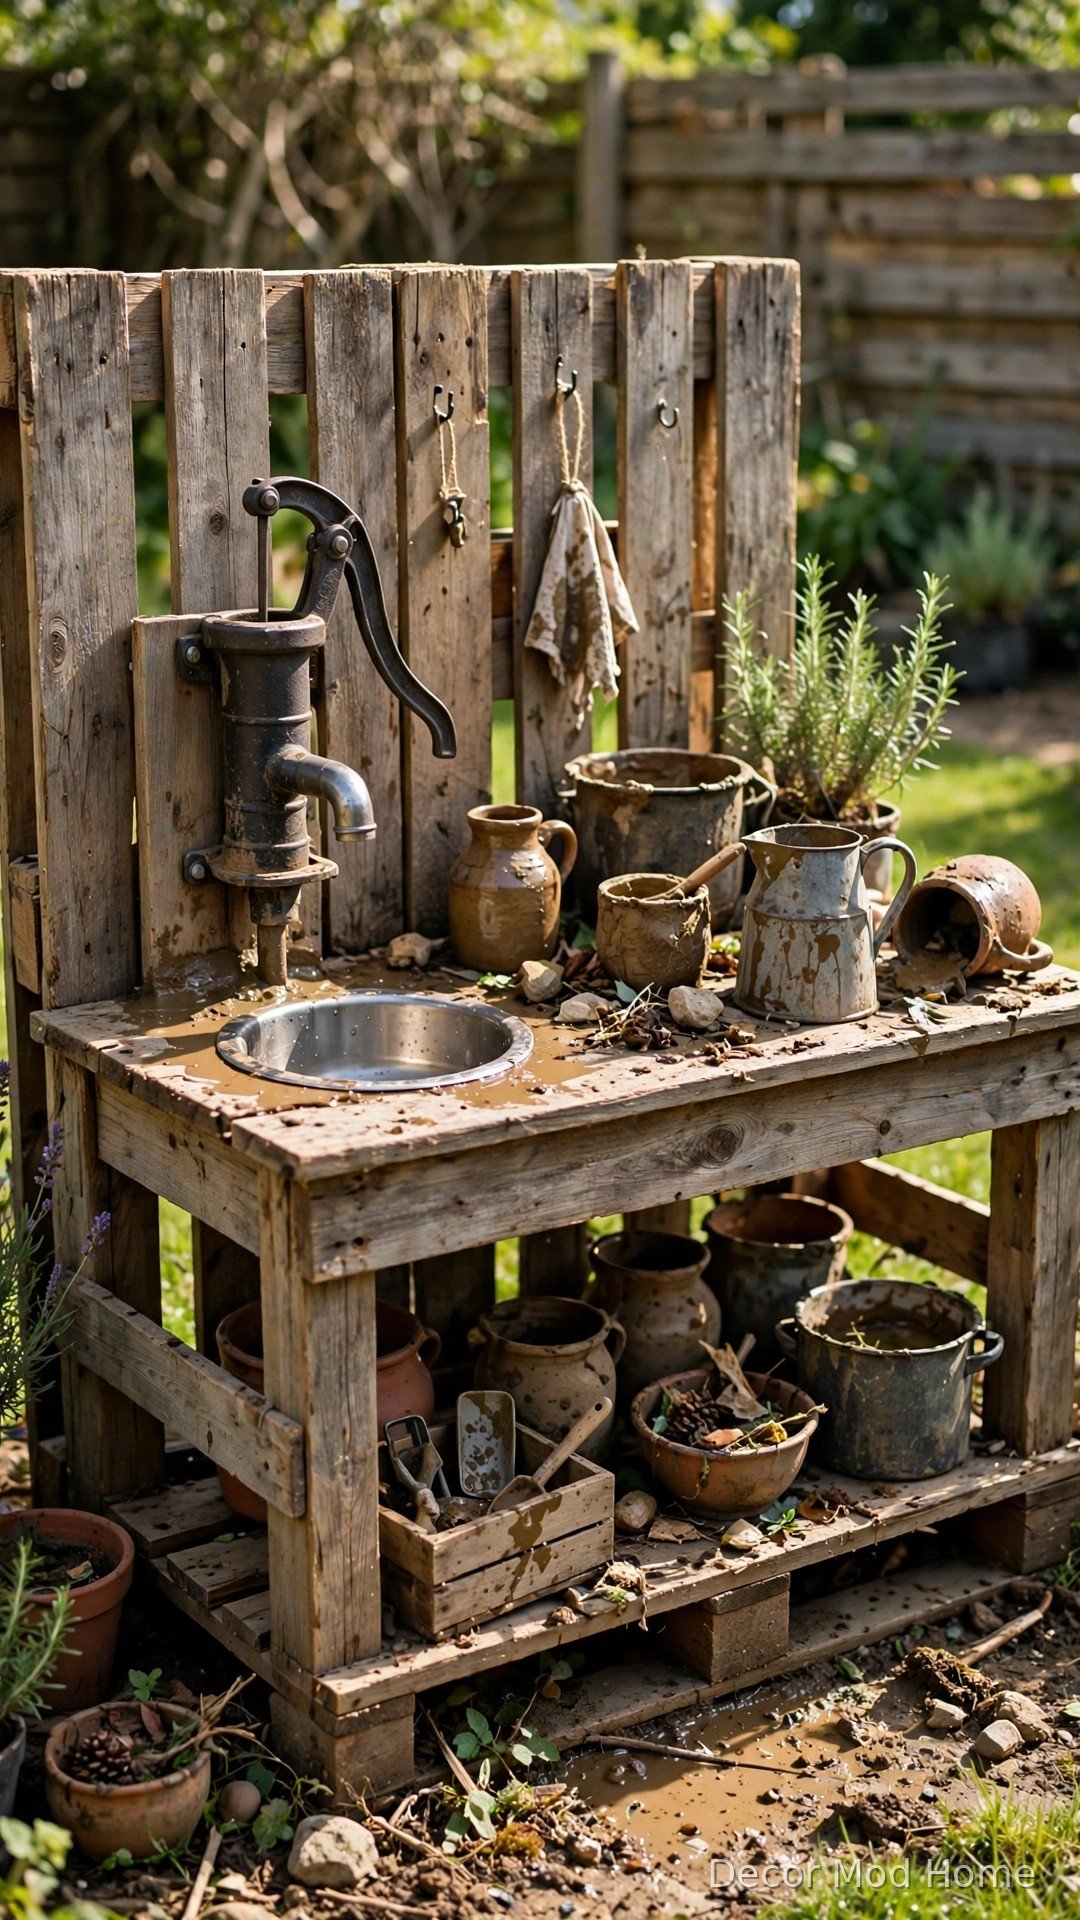
A sink instantly makes a mud kitchen feel like the real thing, and fitting one is easier than you might think. An old washing-up bowl sunk into a hole in the worktop does the job — trace around the bowl, cut with a jigsaw and drop it in so the rim sits flush. For extra magic, add a hand pump or a simple push-tap water dispenser mounted above it so children can “wash up” their pots just like grown-ups. Connect a short length of hose underneath so waste water drains into a bucket rather than turning the ground into a swamp. Little ones will spend astonishing amounts of time simply filling, pouring and emptying the sink — wonderful for hand-eye coordination and wonderfully calming too.
7. Hang Hooks and Shelves for Utensil Storage
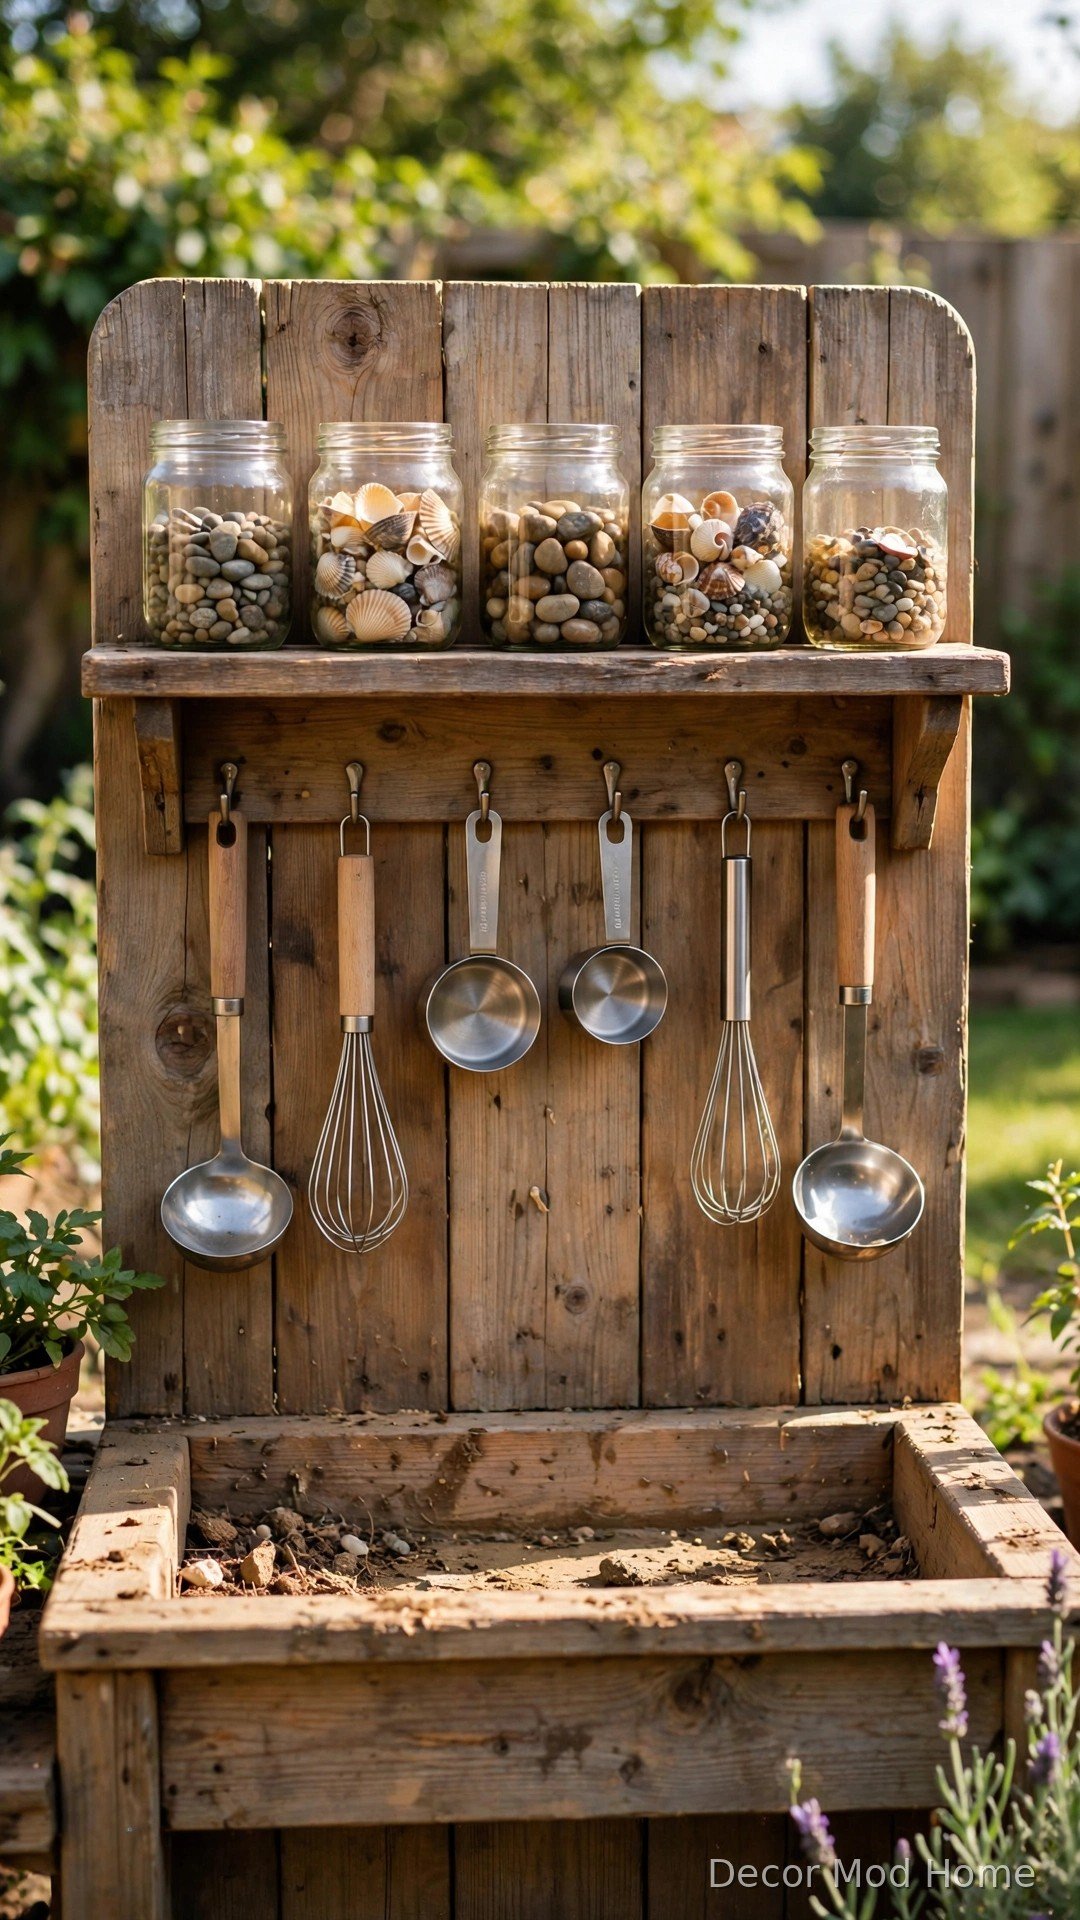
Mud kitchens generate a surprising amount of kit, so hooks and shelves are the accessories that keep everything tidy and within reach. Screw a row of sturdy cup hooks along the back board for ladles, whisks and cups, and fix a simple shelf above the worktop for bowls and jars. Labelling each hook with a painted picture or chalk label turns tidying up into a matching game that even toddlers enjoy. A low shelf is also the perfect spot for a row of jam jars filled with “ingredients” — pebbles, pine cones, dried beans and shells all look beautiful lined up in glass. Good storage teaches little chefs the satisfying habit of putting everything back where it belongs.
8. Provide Sieves, Funnels and Colanders

Sieves, funnels and colanders are the unsung heroes of messy play, quietly introducing early science concepts while children think they are simply having fun. Pouring muddy water through a sieve to separate the stones, watching it swirl down a funnel into a narrow-necked bottle, or rinsing gravel in a colander — these are all mini experiments in filtering, flow and cause and effect. Pick up a few sizes from the pound shop: a fine tea strainer, a chunky kitchen sieve and a couple of funnels. These simple tools extend play enormously, turning five minutes of stirring into half an hour of fascinated pouring, straining and discovering.
9. Add a Herb and Flower Cutting Garden

Nothing elevates mud kitchen creations like fresh “ingredients”, so plant a small herb and flower cutting garden right beside the kitchen. A couple of planters filled with mint, rosemary, lavender and chives give children fragrant leaves to snip and stir into their concoctions. Add some cheerful, fast-growing flowers like marigolds and nasturtiums for petals to sprinkle on mud pies like hundreds and thousands. This is also a gentle introduction to gardening: children learn where ingredients come from, practise using child-safe scissors, and take enormous pride in cooking with things they grew themselves. Just teach the golden rule — pick only from the kitchen garden, never from Mum’s prize roses.
10. Mount a Chalkboard for Menus and Recipes

A chalkboard mounted on the back of the mud kitchen adds a whole new layer of imaginative play — suddenly it is a real café with a menu, daily specials and very demanding customers. Use an offcut of plywood painted with a few coats of chalkboard paint, or pick up an inexpensive framed board and screw it firmly at child height. Provide chunky chalks (easier for little hands than thin sticks) and let them scribble menus, prices and “recipes” to their hearts’ content. Older children love writing out elaborate menus — “worm spaghetti, £2” is a perennial favourite — while younger ones enjoy mark-making and wiping the board clean with a damp sponge. It is brilliant for early literacy, and starting again is all part of the fun.
11. Include Baking Trays and Muffin Tins

Alongside the dedicated baking station, scatter a few extra baking trays, muffin tins and even an old loaf tin around the kitchen for open-ended cooking play. There is something deeply satisfying about pressing mud firmly into a tin, levelling it with the back of a spoon and tapping out a perfect muddy “loaf”. Silicone moulds in fun shapes — stars, hearts, dinosaurs — are brilliant because the creations pop out easily and the moulds rinse clean in seconds. Old tart tins make wonderful individual pies, while a big roasting tray becomes a “dinner table” for serving up a full muddy feast. Look out at car boot sales for battered tins; a little surface rust only adds to the rustic charm.
12. Create a Potion-Making Corner

Every mud kitchen deserves a slightly mysterious potion-making corner where little witches and wizards can brew their most magical mixtures. Set aside one end of the worktop for jam jars, test tubes, pipettes and small bottles of coloured water. Add dried lavender, rose petals, glitter and pine cones as “magic ingredients”, plus a special stirring stick or “wand” for dramatic effect. Children adore the ritual of adding ingredients one by one, chanting spells and watching colours swirl and change. It is sensory play at its finest and a wonderful outlet for big imaginations. A hand-painted sign reading “Potions — Enter If You Dare” completes the spellbinding scene.
13. Add a Sand and Gravel Dig Zone Beside It

Mud is marvellous, but offering different textures takes messy play to another level — so add a sand and gravel dig zone right beside the mud kitchen. A shallow builder’s tray or an old sandpit filled with play sand gives children a dry ingredient to contrast with the wet mud. Add a bag of pea gravel or decorative stones for crunch and sparkle, plus spades, buckets and toy diggers for proper construction-site play. Children love combining the zones: sand for “flour”, gravel for “chocolate chips”, mud for the cake mixture itself. A lid or tarpaulin over the sand tray keeps neighbourhood cats at bay, and a stiff brush by the kitchen helps contain the inevitable sandy footprints trailing towards the house.
14. Use Crates and Baskets for Toy Organisation

With bowls, utensils, moulds and ingredients multiplying fast, crates and baskets are the storage accessories that stop your mud kitchen descending into chaos. Slide wooden crates or sturdy plastic boxes underneath the worktop to hold the bigger items — watering cans, buckets and spare bowls — and line the shelves with smaller baskets for whisks, cutters and “spice” jars. Wicker baskets look beautiful but will eventually rot outdoors, so save those for covered areas and use plastic or metal containers for anything left out in the rain. Labelling each crate with a picture label means even the youngest chefs can help with the end-of-play tidy-up. When children can see and reach everything easily, they play more creatively and for much longer.
15. Finish With a Wash-Up Station for Easy Tidy-Ups

The secret to a mud kitchen that gets used again and again — rather than abandoned after one epic session — is making the clean-up easy and fun. Set up a simple wash-up station nearby: a large bucket of clean water, an old towel or two, and perhaps a stiff brush for scrubbing bowls. Show children how to rinse utensils and stack them on a draining rack ready for next time, making tidying the final satisfying chapter of the play. Keep a dedicated “mud kitchen towel” on a hook for wiping hands, and stash a change of clothes and wellies by the back door for truly committed chefs. When children know the mess has a proper ending, parents relax — and relaxed parents say yes to muddy play far more often.
FAQs About Mud Kitchen Accessories
What age is a mud kitchen suitable for?
Mud kitchens are wonderful for children from around 18 months right up to 8 or 9 years old, though the way they play changes as they grow. Toddlers love the sensory joy of scooping, pouring and squashing, while older children invent elaborate cafés, bakeries and potion shops with menus and recipes. Always supervise young children around water, and avoid small accessories like dried beans with under-threes who still mouth objects. Choose sturdy, unbreakable accessories — stainless steel and wood rather than glass — and keep the water supply shallow and manageable. With the right setup, a mud kitchen genuinely grows with your child for years.
What should I put in a mud kitchen?
Start with the basics: a few stainless steel bowls, wooden spoons, an old saucepan, a jug and a bucket of water. Then add interest with sieves, funnels, muffin tins, baking trays and jam jars for collecting “ingredients” like pebbles, petals and pine cones. Natural loose parts are free and versatile — sticks, shells, conkers and dried flowers. A chalkboard for menus, some hooks for hanging utensils and a herb pot for snipping complete the classic setup. You really do not need to spend much: charity shops and car boot sales are perfect hunting grounds, and children care far more about pouring and mixing than shiny new equipment.
How do I keep a mud kitchen from getting too messy?
A little strategy goes a long way. Site the kitchen on grass or bark chips rather than the patio, and well away from the washing line. Set clear, simple boundaries — mud stays in the kitchen zone, and shoes come off at the back door. Provide a wash-up station with a bucket of clean water and old towels so children can clean tools and hands before coming inside, and keep a dedicated set of “mud clothes” and wellies by the door. A tarpaulin under the kitchen catches the worst of the splashes and can be hosed down in minutes. Embrace a certain amount of glorious mess — it washes off, and the benefits are well worth a muddy doorstep.
How do I weatherproof a wooden pallet mud kitchen?
Start with heat-treated (HT-marked) pallets and sand off any splinters before assembly. A couple of coats of exterior wood paint, fence stain or yacht varnish will protect the timber from rain and dramatically extend its life — let each coat dry fully between applications. Pay special attention to the legs and any parts touching the ground, as these rot first; standing the kitchen on paving slabs or bricks keeps the wood out of standing water. Metal brackets and exterior screws resist rust far better than standard fixings. Each autumn, give the kitchen a scrub and a fresh coat of stain, and bring accessories indoors over winter to keep everything in good shape for spring.
Ready to Build Your Mud Kitchen Masterpiece?
A mud kitchen is so much more than a pile of old pallets — with the right mud kitchen accessories for messy play, it becomes a bakery, a café, a potion lab and a science station all rolled into one, right in your own back garden. Start with the sturdy base and the essential bowls and spoons, then add the extras that spark your child’s imagination, whether that is a chalkboard menu, a potion corner or a herb garden to snip from. Remember, the best accessories are often the cheapest: charity-shop finds, kitchen cast-offs and natural treasures cost next to nothing and inspire the richest play. We would love to see what you create — share your mud kitchen photos in the comments below, pin your favourite ideas to save them for later, and happy muddy cooking!