16 Brilliant Home Aesthetic DIY Ideas
If your rooms feel a little flat but your budget is even flatter, this list is for you. These 16 brilliant home aesthetic diy ideas prove that a beautiful, magazine-worthy home doesn’t require an interior designer or a five-figure budget — just a free weekend, a few affordable materials, and a little creativity. Every project below is beginner-friendly, uses supplies you can find at any craft store or hardware shop, and is designed to deliver maximum visual impact for minimum spend. Whether you live in a rented flat you can’t paint or a forever home you’re slowly making your own, you’ll find something here that transforms how your space feels. Grab a cup of tea, bookmark your favourites, and let’s turn your home into the cosy, characterful haven you’ve been pinning for years.
1. Paint an Arch Accent Wall
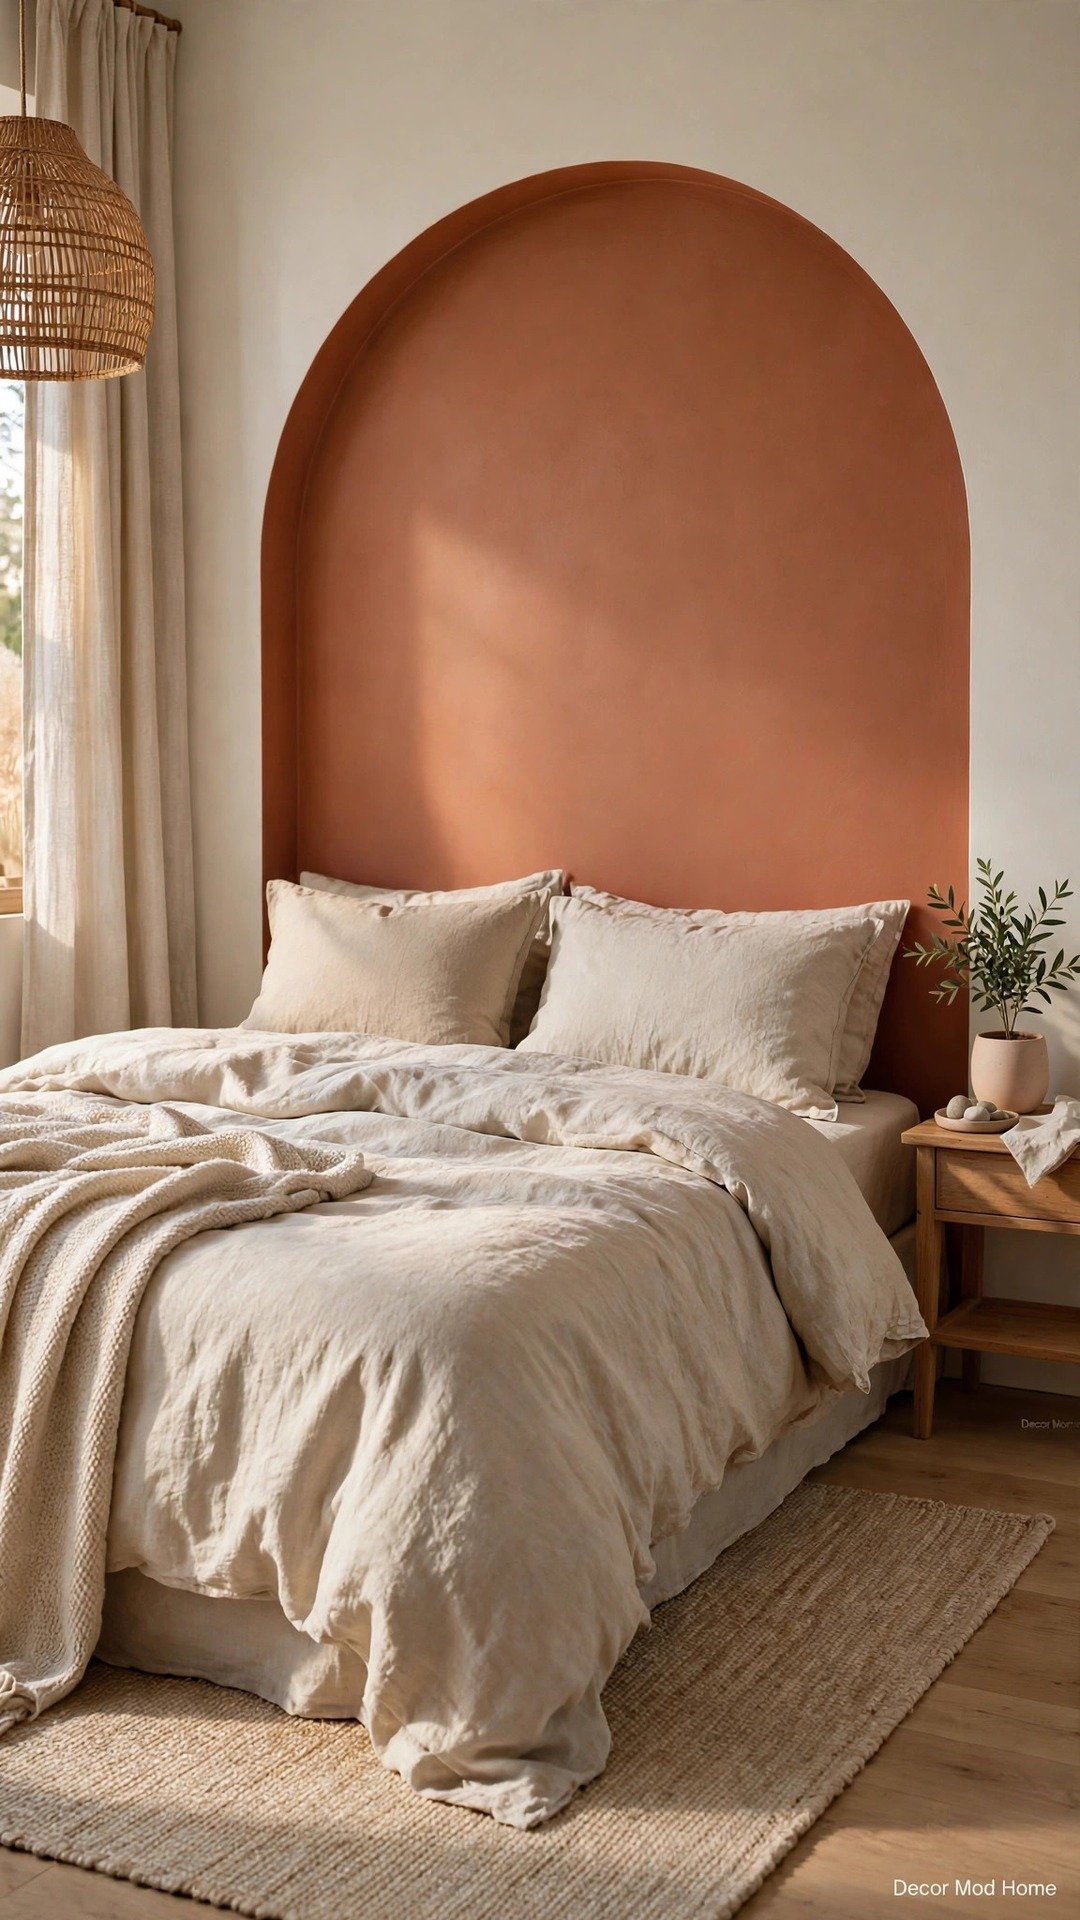
Nothing transforms a plain room faster than a painted arch, and it’s one of the simplest weekend projects you can tackle. An arch in a warm terracotta, sage green, or soft mustard instantly adds architectural interest where there is none — perfect for renters who can paint, and a dream backdrop for beds, desks, and reading corners. All you need is a tin of sample paint, a pencil, string, and painter’s tape. Trace the arch with the string-and-pencil method, fill it in with two coats, and step back: the room suddenly looks designed rather than decorated. Keep furniture and art minimal in front of it so the shape does the talking, and choose a colour that echoes your cushions or rug for a pulled-together look that costs less than a takeaway dinner for two.
2. Create a Floating Shelf Gallery

Floating shelves turn dead wall space into a curated display, and they cost a fraction of built-in shelving. Fit two or three slim picture ledges above a sofa, desk, or in a hallway, then layer them with framed prints, small plants, candles, and books. The beauty of this idea is how easily it evolves — swap pieces seasonally or whenever the mood strikes, no nails or commitment required. Paint the shelves the same colour as the wall for a seamless, high-end look, or stain them in warm oak for contrast. Arrange items in odd-numbered groups, vary the heights, and leave some breathing room so it reads as intentional styling rather than clutter. It’s storage, art, and personality all in one brilliant little project.
3. Weave a Basket Wall Display

A cluster of woven baskets on the wall adds warmth, texture, and that effortlessly collected feel designers charge a fortune for. Pick up flat-backed seagrass, rattan, or jute baskets from charity shops, markets, or budget home stores — mismatched is the whole point. Arrange them on the floor first, playing with sizes until you like the composition, then hang them with small nails or adhesive hooks. This works beautifully above a sideboard, in a dining nook, or filling an awkward narrow wall. The natural fibres soften modern rooms and complement boho, farmhouse, and coastal schemes alike. For under the price of one framed print, you get a full statement wall that guests will ask about every single time.
4. Style a Candle Cluster Centrepiece
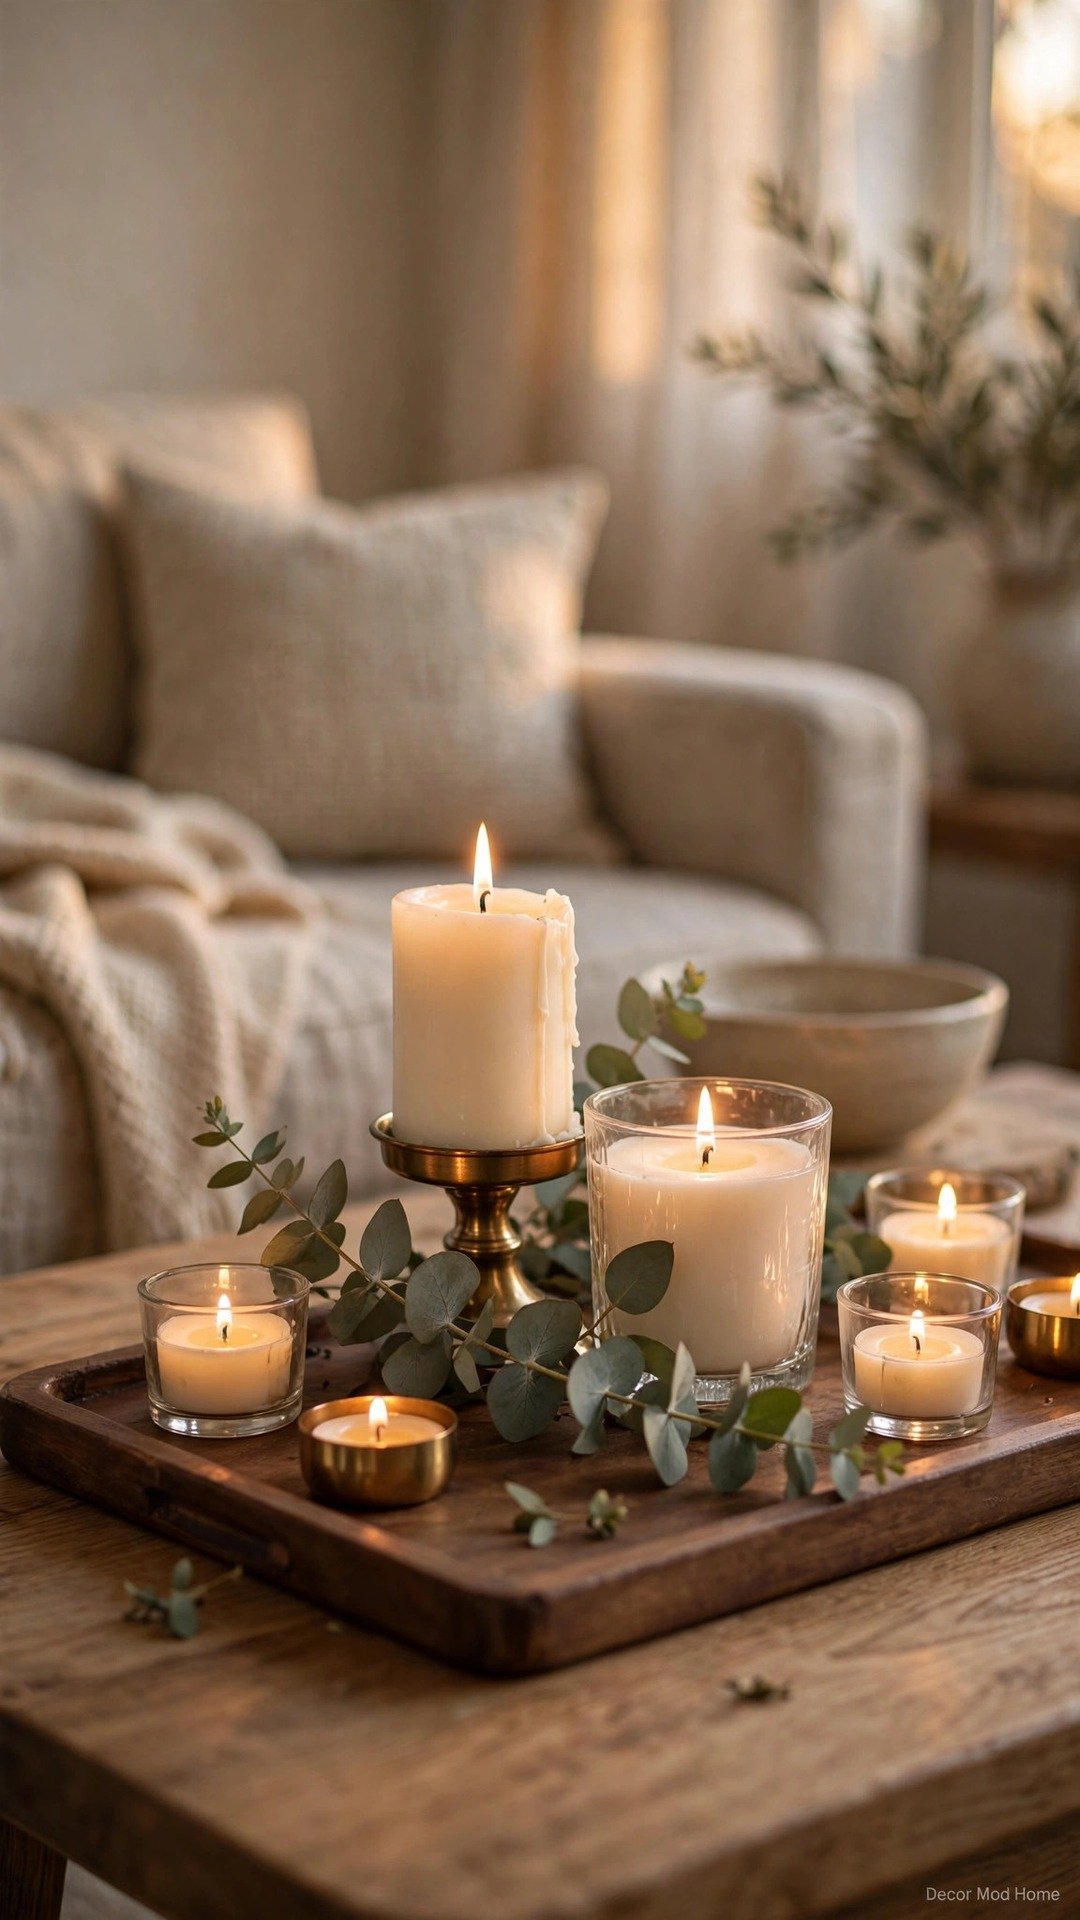
Candlelight is the cheapest atmosphere money can buy, and a styled cluster beats a single lonely candle every time. Gather pillar candles, tea lights, and hurricanes in varying heights — brass, glass, and ceramic holders all mix beautifully — and arrange them on a tray, wooden board, or marble slab. The tray is the secret: it corrals everything into one intentional vignette instead of scattered clutter. Add a sprig of eucalyptus or a few dried flowers for colour, and keep unscented candles for the dining table so they never compete with dinner. Group in odd numbers, light them in the evening, and watch your living room or bathroom transform into the cosiest corner of the house.
5. Refresh Furniture with Chalk Paint
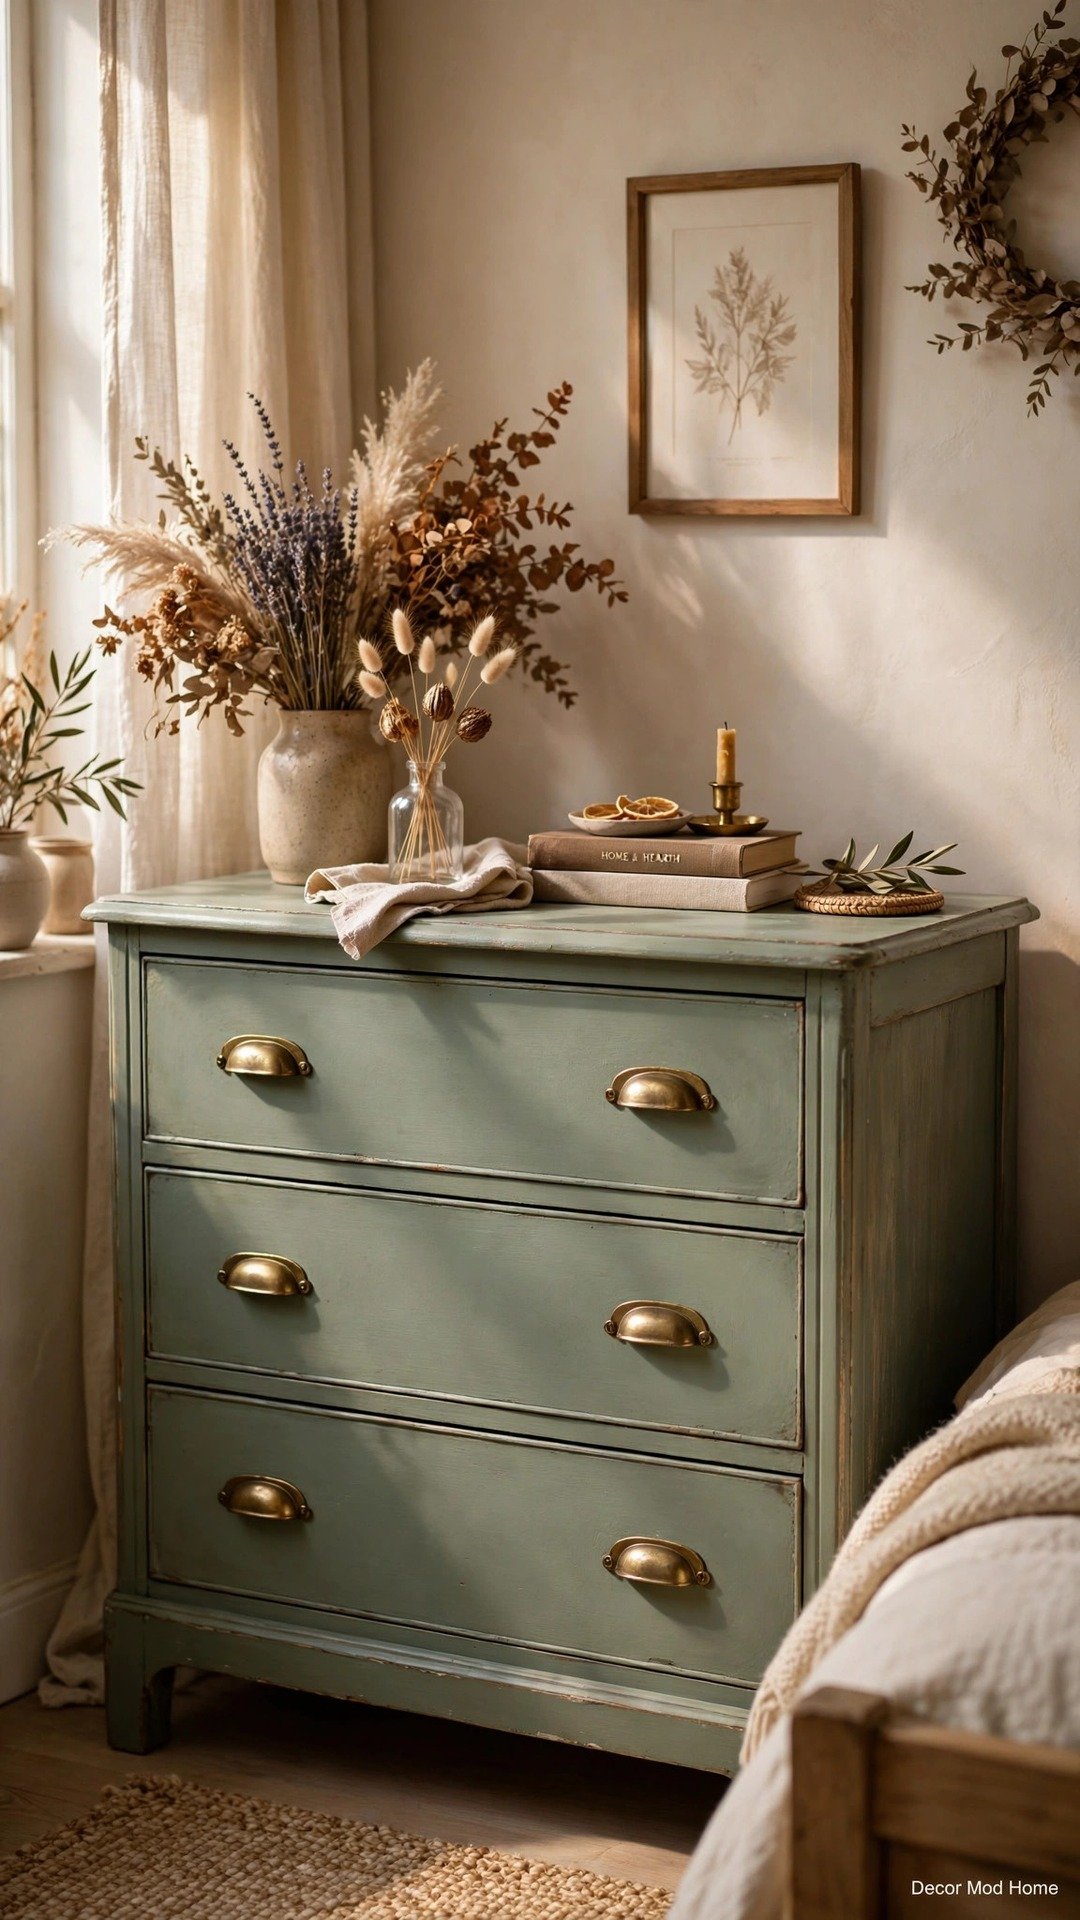
Before you bin that tired dresser or dated side table, give chalk paint a chance — it requires no sanding and sticks to almost anything, making it the ultimate beginner furniture makeover. Clean the piece, apply two thin coats, then seal with wax or a matte topcoat for durability. A dated pine bookcase becomes a chic sage-green statement; a scratched coffee table turns into a warm charcoal anchor for the room. Swap the handles for brass or leather pulls and it looks genuinely bespoke. This one tin of paint can refresh three or four small pieces, so it’s possibly the highest-impact, lowest-cost project on this list. The hardest part is choosing the colour.
6. Arrange Dried Flower Bouquets
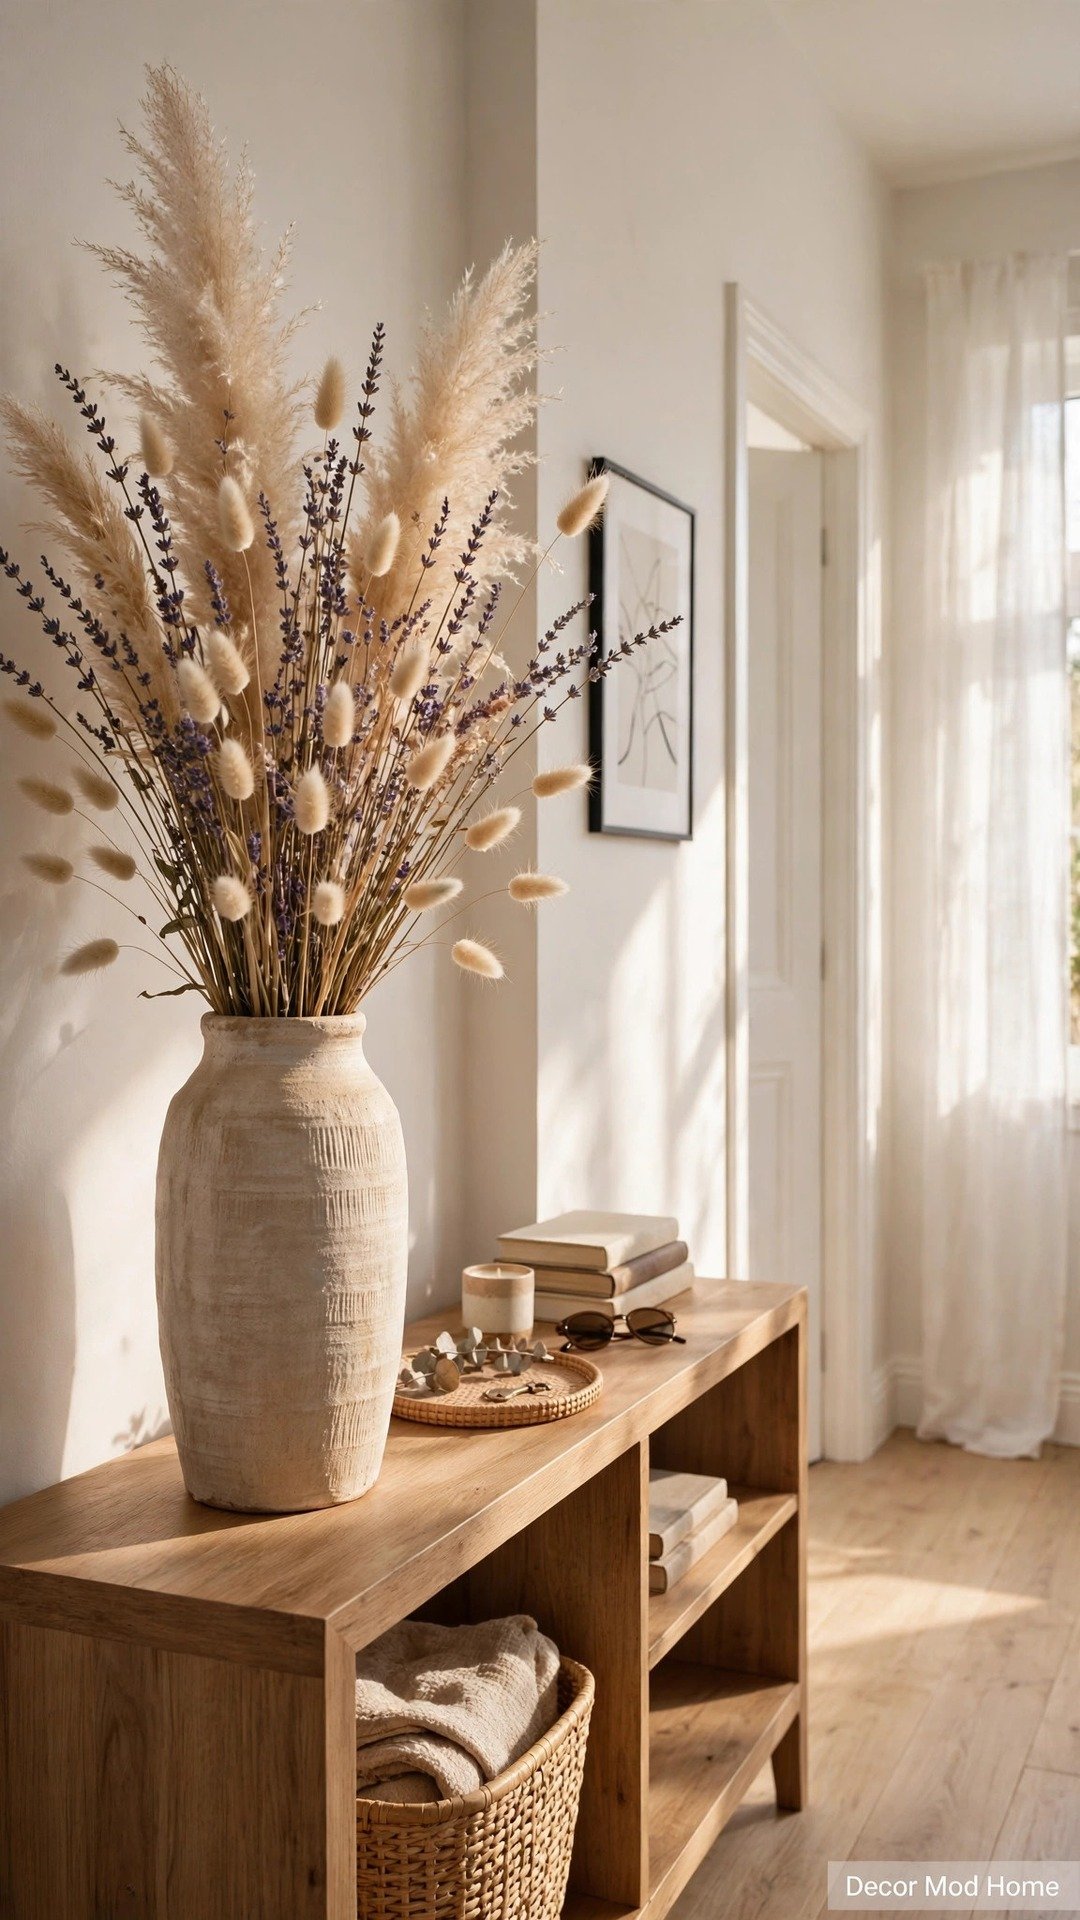
Dried flowers deliver all the softness of fresh blooms with none of the weekly expense or wilting guilt. Pampas grass, dried lavender, bunny tails, and eucalyptus last for years and suit every aesthetic from minimalist to cottagecore. Style them in a tall ceramic or glass vase — no water needed — and place them where they’ll be seen: a hallway console, a bedroom corner, or beside the fireplace. Keep them out of direct sunlight to prevent fading, and give them a gentle shake outside every few months to clear dust. A single generous bouquet costs less than two weeks of fresh flowers and looks beautiful for seasons. Mix textures and heights for an arrangement that looks professionally styled.
7. Make Macramé Plant Hangers
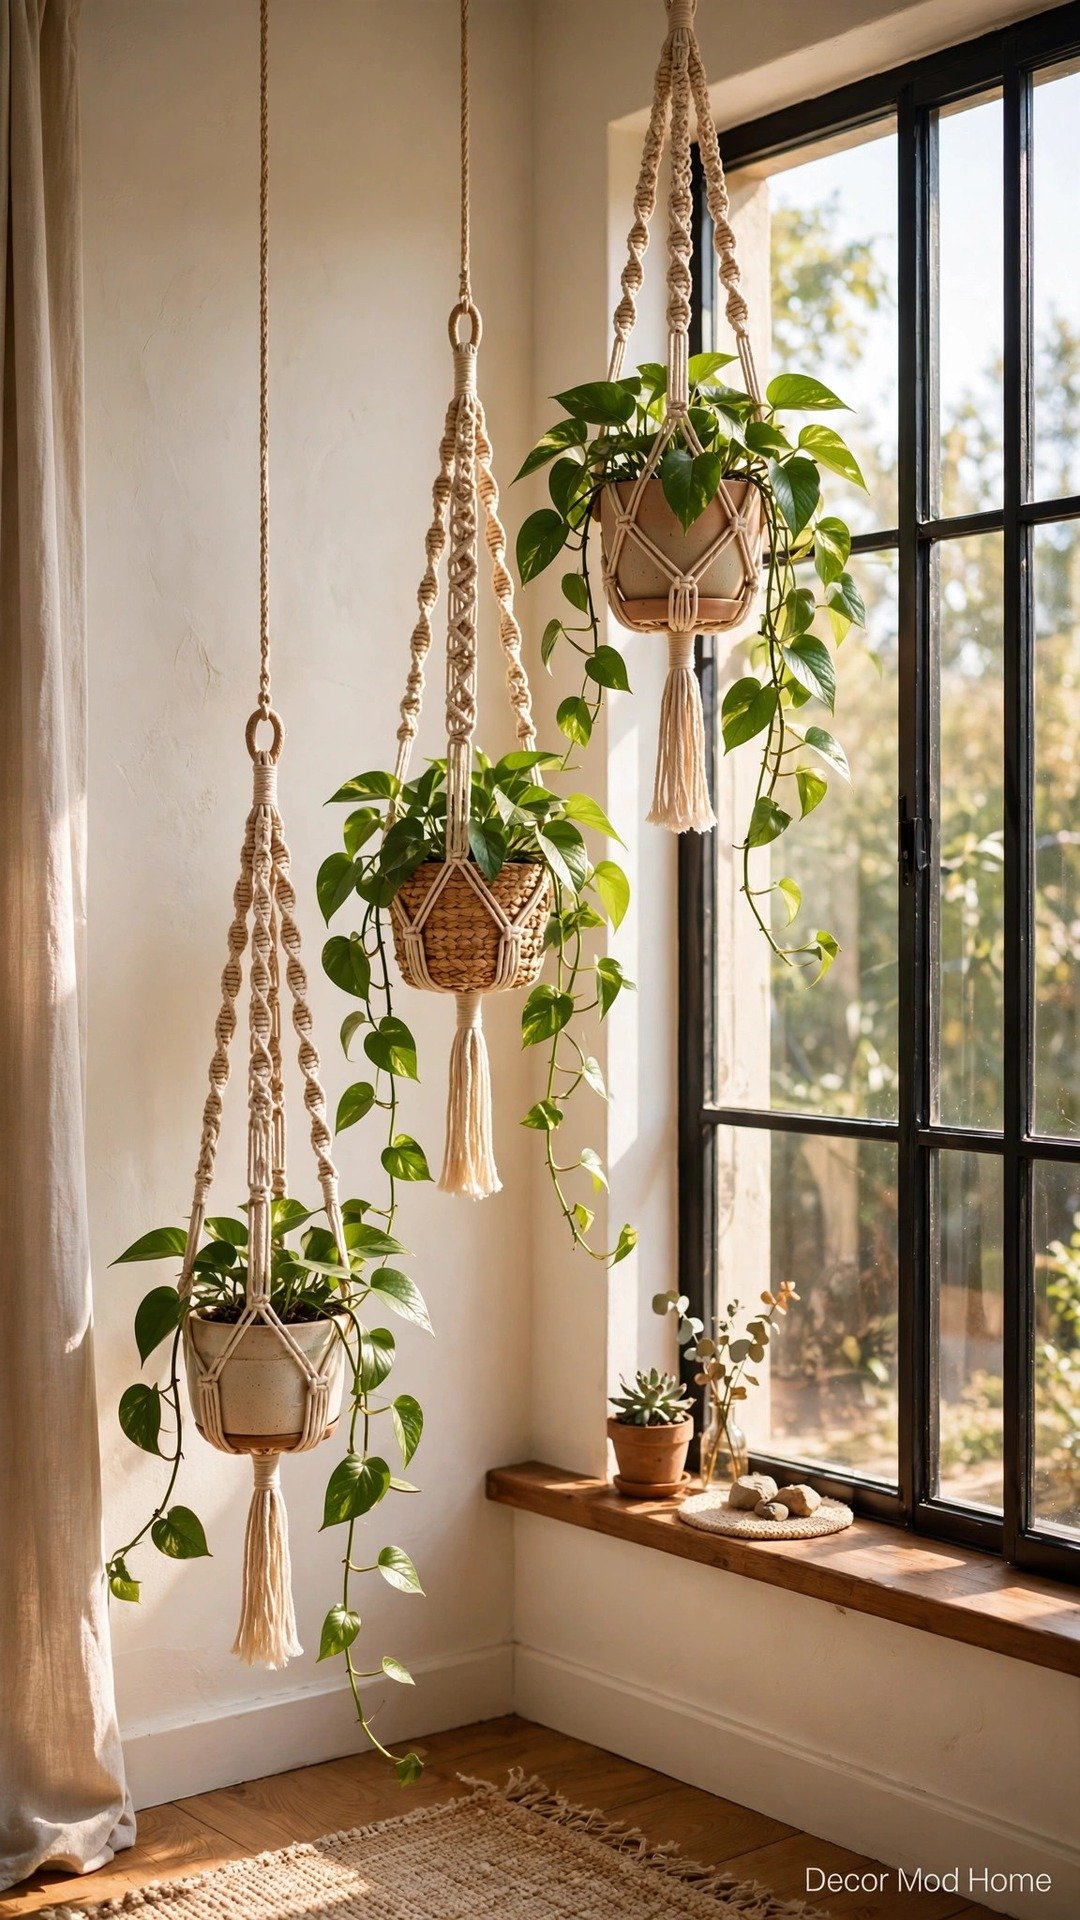
Macramé plant hangers bring greenery to eye level and add handmade texture that softens any room. You only need cotton cord, a wooden ring, and a basic knot tutorial — the square knot and lark’s head will carry you through the whole project. Your first hanger might take an hour; by the third you’ll be knotting while watching television. Hang them at varying heights in a sunny corner or window to create a floating indoor garden, and choose trailing plants like pothos or string of pearls for maximum effect. Natural cord suits neutral schemes, while dyed cord in rust or mustard adds a colour pop. It’s a relaxing craft that ends with décor you’d happily pay boutique prices for.
8. Build a Photo Ledge Gallery

A photo ledge gallery is the renter-friendly answer to the classic gallery wall — no rows of nail holes, no commitment, and endlessly changeable. Mount one or two narrow ledges in a hallway, stairwell, or above a desk, then lean framed prints, postcards, and small canvases along them, overlapping slightly for a collected feel. Mix black, oak, and white frames for an eclectic look, or keep them uniform for calm minimalism. The genius is in the flexibility: refresh the display for seasons, swap in holiday cards, or rotate your favourite travel shots whenever you like. It turns personal memories into proper décor and fills blank walls with warmth for the cost of a few frames.
9. Try the Limewash Wall Effect
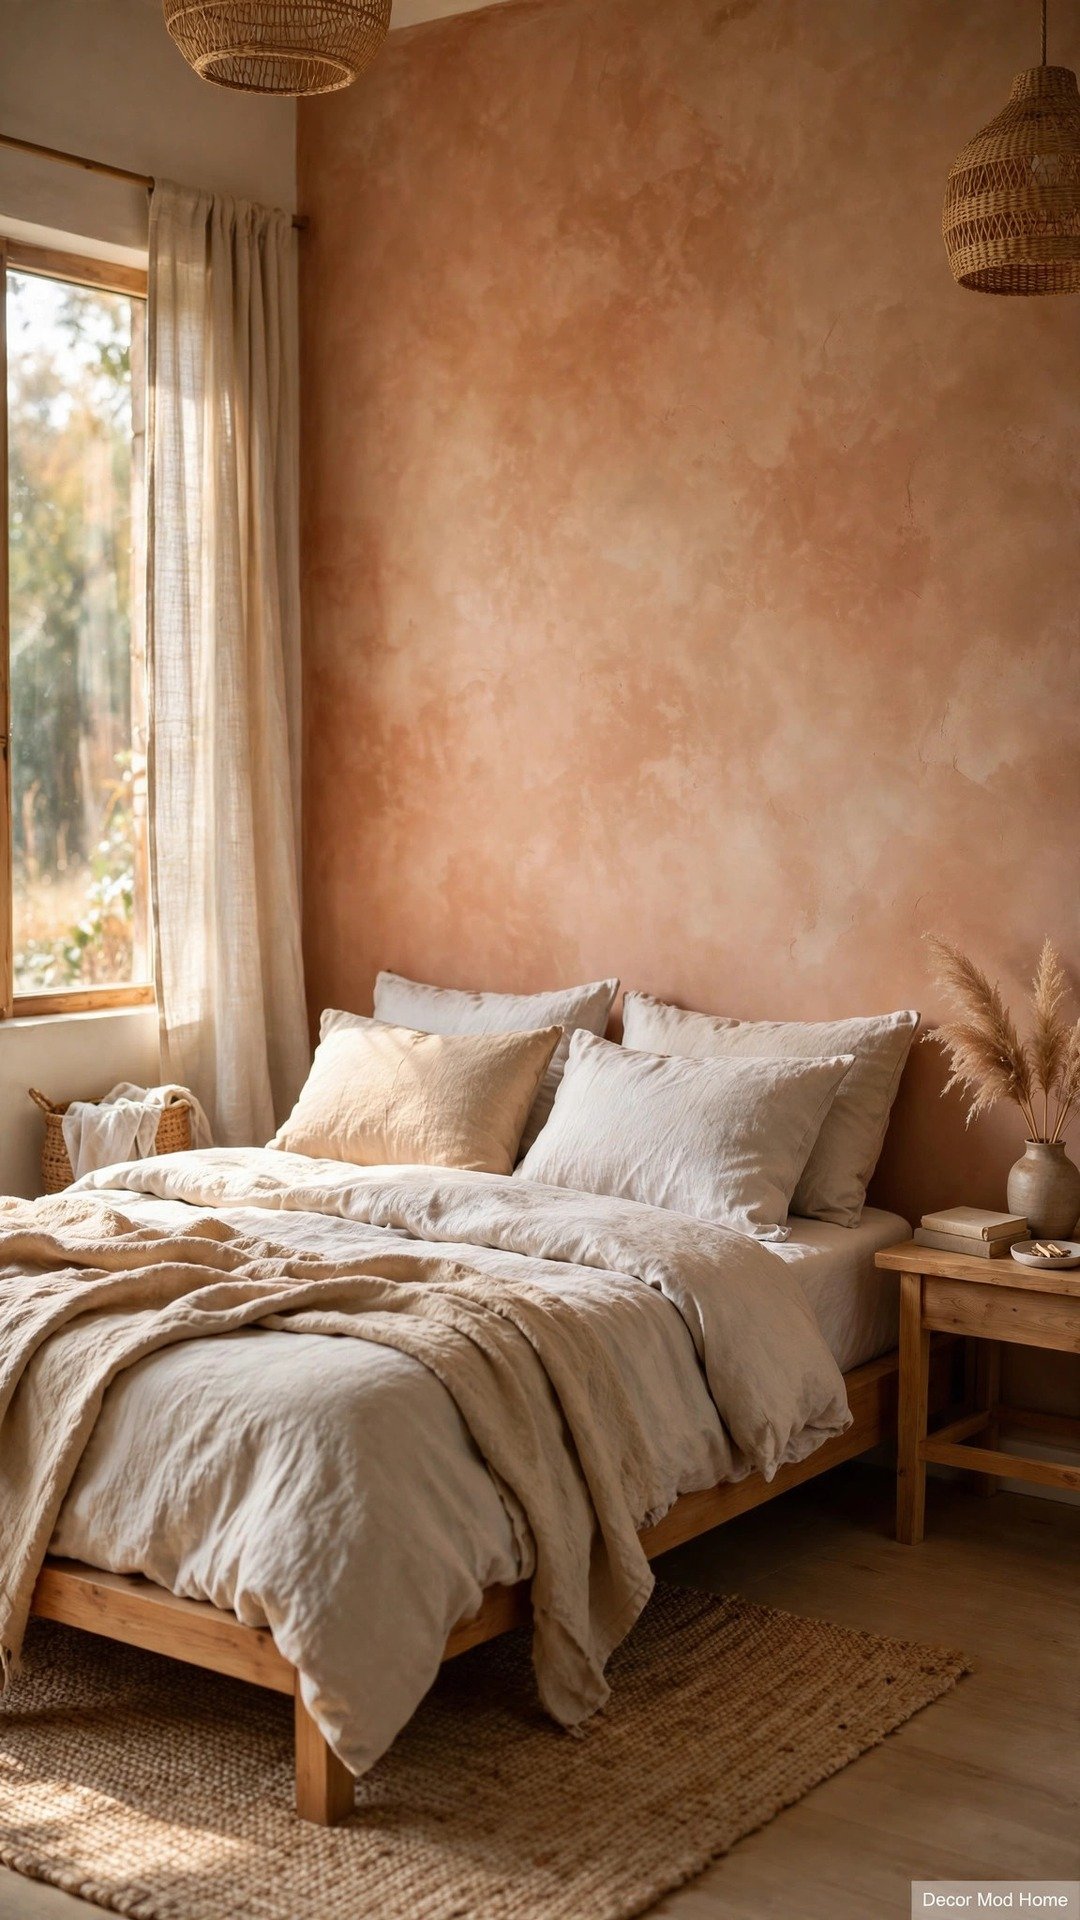
Limewash paint creates that soft, cloudy, old-European-plaster look that’s all over designer interiors right now — and the application is far more forgiving than it sounds. The mottled finish is the entire point, so imperfect brushwork actually improves the result. One feature wall in warm white, clay, or muted olive adds depth and movement that flat paint simply can’t match. You’ll need limewash-specific paint and a large block brush, applied in criss-cross strokes over a primed wall. It suits bedrooms and living rooms beautifully, especially paired with natural linen, wood, and stone textures. The effect reads as expensive and artisanal, yet the whole wall typically costs less than a single designer cushion.
10. Layer Vintage-Style Mirrors

Mirrors bounce light around a room and make small spaces feel twice their size, but a single mirror can look flat — layering several is the designer’s trick. Hunt charity shops, car boot sales, and online marketplaces for ornate, arched, or brass-framed mirrors in different shapes, then cluster them on one wall or lean a large one over a smaller one on a mantel. The mixed frames create a gallery effect that’s far more interesting than one big rectangle. Place them opposite a window to double your daylight, or in a dark hallway to fake brightness. Gold and brass tones flatter every scheme, and the whole collection often costs less than one new mirror from a high-street store.
11. Style Open Shelves Like a Designer
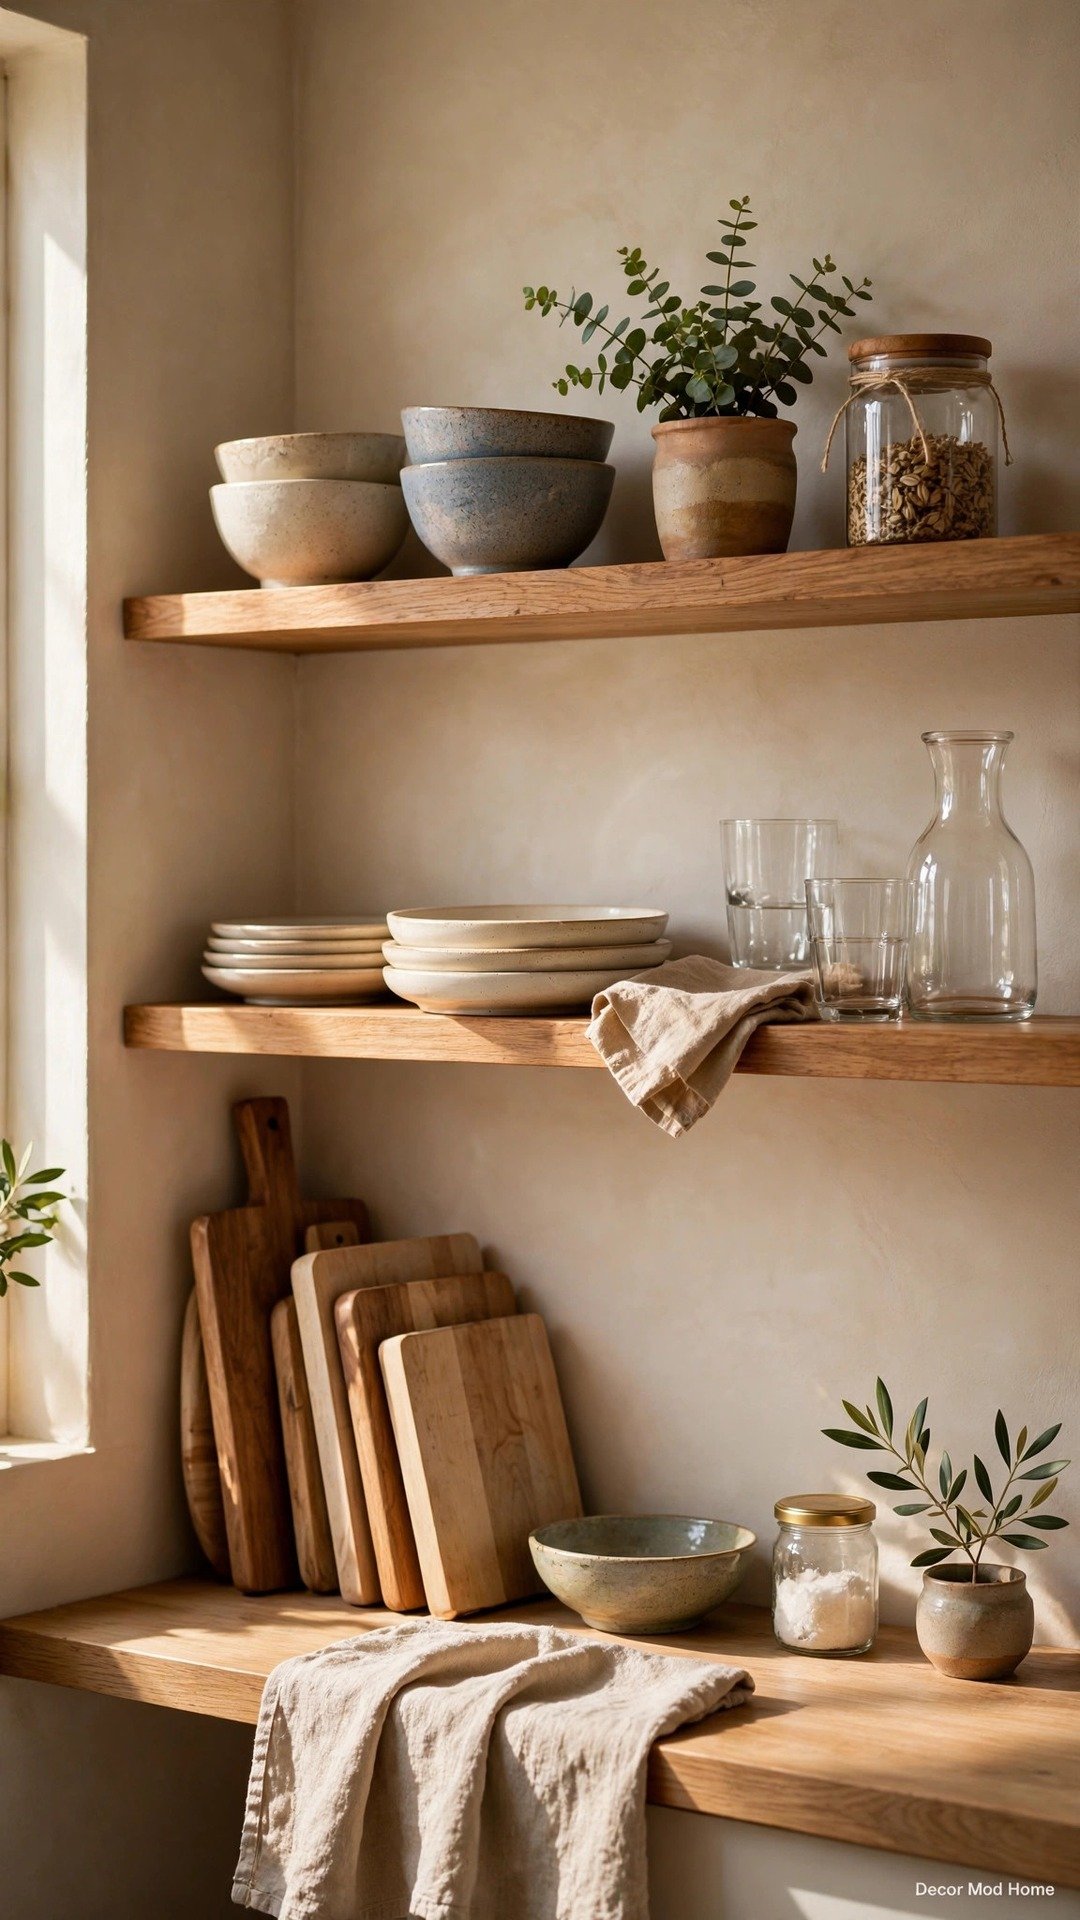
Open kitchen or living-room shelves look either effortlessly chic or chaotically cluttered — the difference is a simple styling formula. Start by removing everything, then rebuild with the rule of thirds: one third everyday items you actually use, one third beautiful basics like ceramic bowls and glassware, and one third decorative pieces such as small art, plants, and candles. Stack plates and bowls, lean cutting boards against the wall, and corral small items on trays. Keep a consistent colour palette of two or three tones so it reads as curated. Step back, edit ruthlessly, and leave negative space. The result looks straight out of a styling shoot, and it cost you nothing but an afternoon.
12. Cover Storage Boxes with Fabric
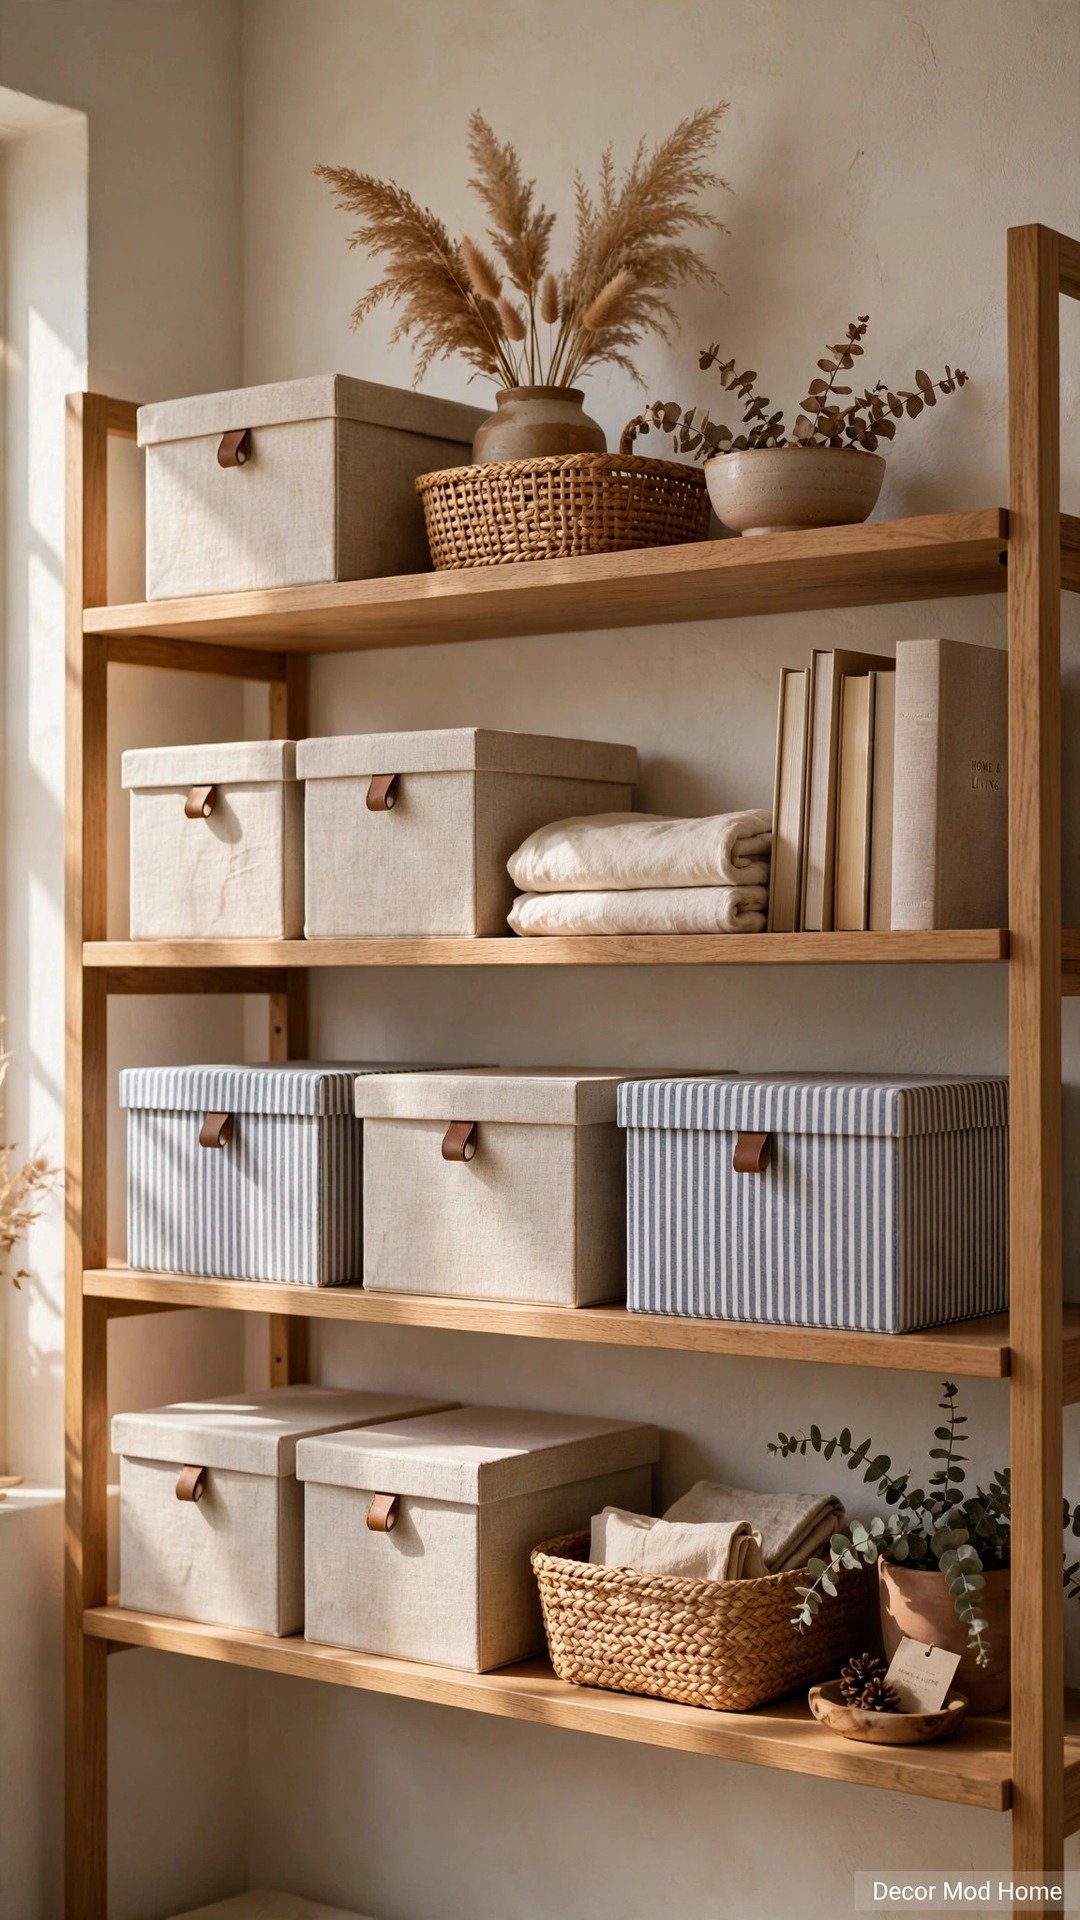
Ugly plastic storage boxes are a necessary evil in most homes — but they don’t have to look like it. Wrapping cardboard or plain boxes in fabric with a glue gun turns eyesores into décor that blends with your scheme. Choose linen, ticking stripe, or a pretty floral that matches your room, wrap it like a gift, and secure the seams inside where they won’t show. Add a small label holder or leather pull for a finished, boutique-storage look. Use them on open shelves, in wardrobes, or stacked in a hallway for shoes and scarves. It’s a twenty-minute project per box that hides clutter beautifully and makes even the most practical corners of your home look intentional.
13. Paint Terracotta Pots

Plain terracotta pots are wonderfully cheap, and with a little paint they become custom planters that look far more expensive. Try colour-blocking with two tones, painting simple arches or sun motifs, or going full matte white for a modern minimalist look. Acrylic or sample wall paint works perfectly — just seal outdoor pots with a clear varnish so the design survives the weather. Group painted pots in threes on windowsills, doorsteps, or patio tables, mixing sizes for a lush, layered display. It’s a brilliant project to do with kids, costs pennies per pot, and instantly elevates every plant you own. Even a single painted pot beside the front door makes your entrance feel cared for.
14. Layer Rugs for Instant Cosiness

Layering rugs is the stylist’s shortcut to a room that feels warm, collected, and expensive. Start with a large, affordable flat-weave or jute rug as the base, then layer a smaller patterned or sheepskin rug on top at a slight angle. The combination adds texture, defines zones in open-plan spaces, and makes hard floors feel soft underfoot. It works in living rooms, bedrooms, and even under dining tables — just keep the top rug’s edges clear of chair legs. Mixing a natural base with a vintage-style patterned top is a fail-safe formula. You get the look of a pricey hand-knotted rug for the cost of two budget finds, and bare feet will thank you every morning.
15. Upholster a Simple Headboard
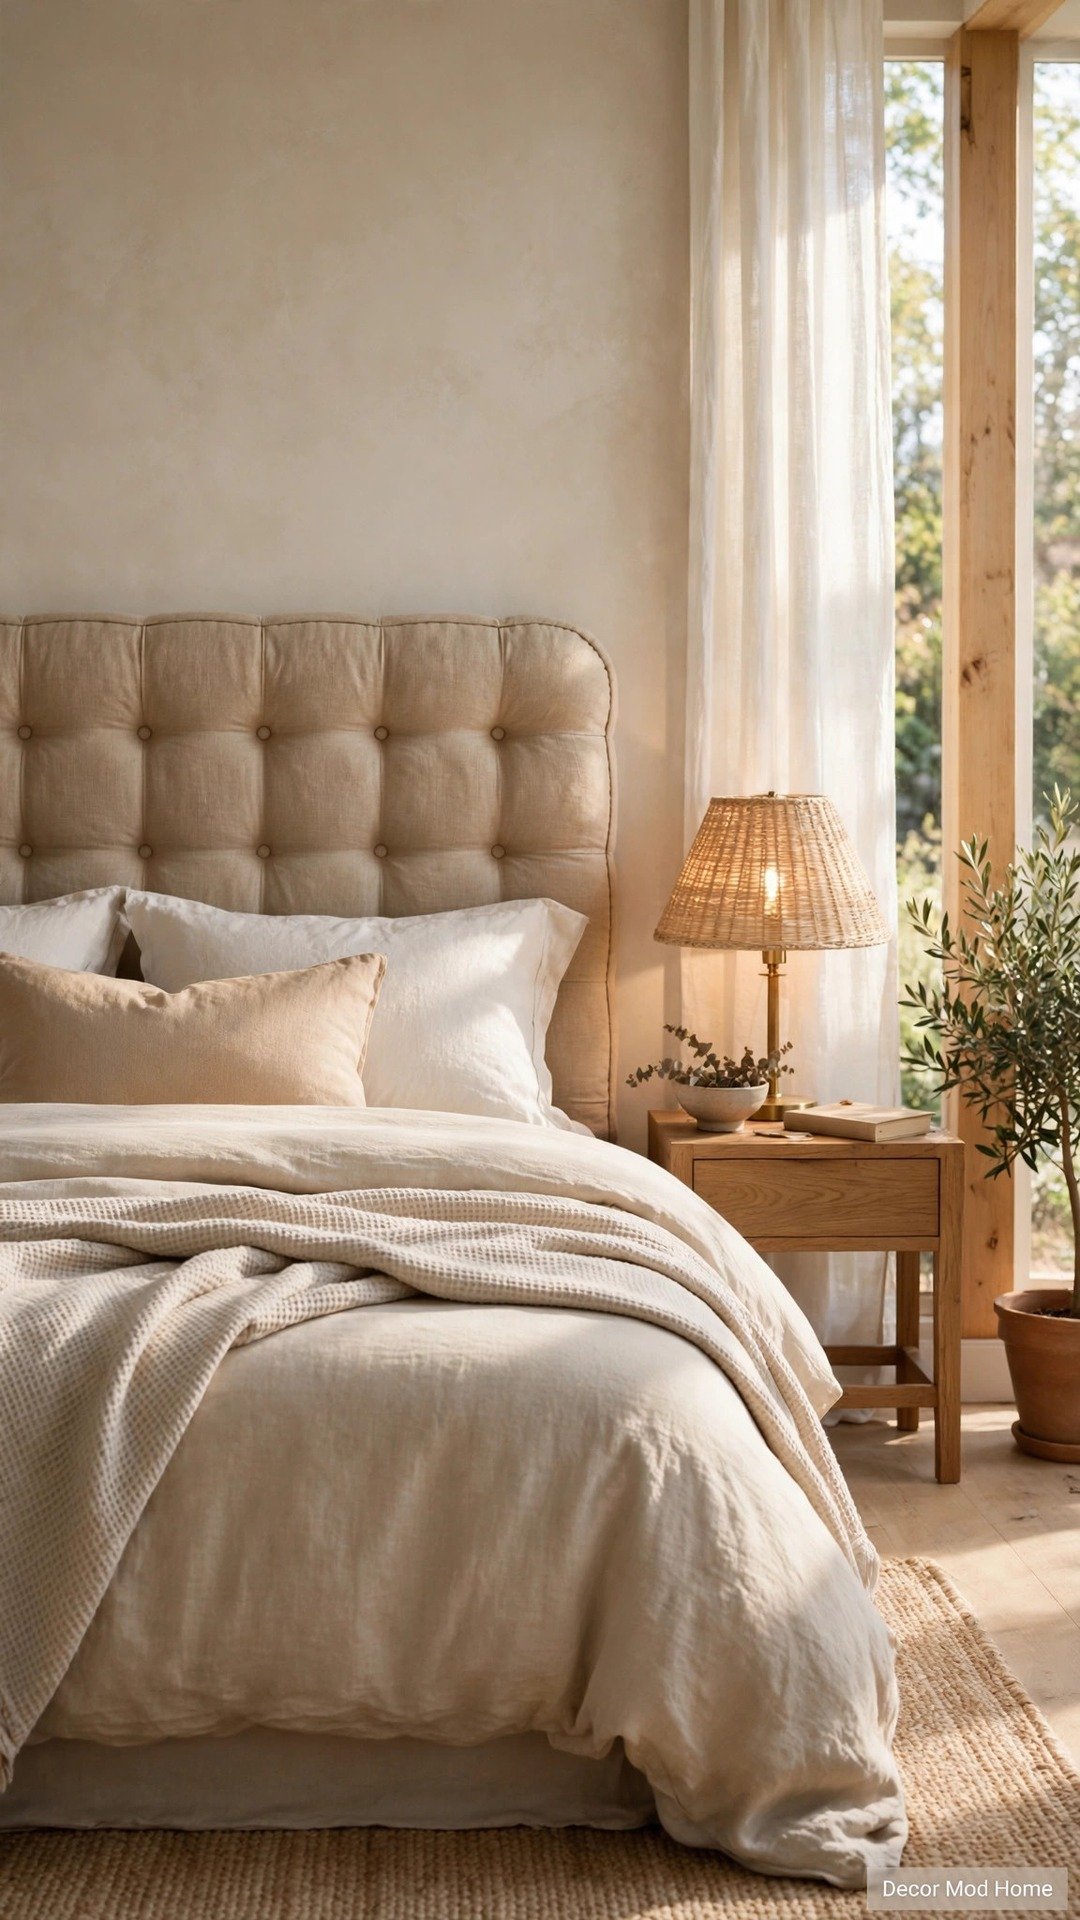
A headboard completely changes a bedroom, and upholstering your own is far easier than it looks. Cut plywood or MDF to size, wrap it in two layers of foam and wadding, then staple your chosen fabric tightly around the back. Linen, velvet, and bouclé all look luxurious and hide minor imperfections in your stapling. Mount it on the wall with a French cleat or simply wedge it behind the bed. An arched or rectangular shape suits most rooms, and piping or button tufting adds a professional finish if you’re feeling ambitious. For the price of one restaurant meal, your bedroom gains the tailored, hotel-style focal point that makes the whole space feel finished.
16. Frame Botanical Prints as a Collage

Botanical prints bring the calm of nature indoors and suit literally every decorating style, from Scandi to traditional. Print free vintage botanical illustrations — museums and archives offer thousands in the public domain — in matching sizes, then frame them in simple identical frames for a cohesive gallery. A grid of six or nine above a console table or bed looks sharp and intentional, while a looser salon-style cluster suits cottage and eclectic rooms. Keep the frames uniform and let the artwork vary, or vice versa, but not both. The prints cost nothing, budget frames are a few pounds each, and the result looks like something from a high-end print shop. It’s the easiest art upgrade there is.
FAQs
What are the cheapest DIY ideas for a home aesthetic on a budget?
Paint is unbeatable for impact per pound — an arch accent wall or chalk-painted furniture transforms a room for the cost of a single tin. Styling what you already own, like the open-shelf formula or a candle cluster on a tray, costs nothing at all. Thrifted baskets, mirrors, and frames deliver designer looks for pocket money, so start with paint and styling before buying anything new.
How can I make my home look aesthetic without painting the walls?
Focus on texture and layering instead: woven basket displays, layered rugs, dried flower arrangements, and macramé hangers all add warmth without touching the walls. Photo ledges, leaning mirrors, and fabric-covered storage use hooks or gravity rather than paint. Removable wallpaper and large-scale art are also renter-friendly ways to add colour and pattern.
Which DIY projects add the most value to a room’s look?
The projects that change the largest visual surface win — an upholstered headboard, a limewash or arch feature wall, and layered rugs each redefine how a whole room feels. After that, lighting-adjacent styling like mirror clusters and candle vignettes elevates the atmosphere, especially in the evening when most of us actually enjoy our homes.
How do I keep DIY décor looking stylish rather than crafty?
Restraint is everything: stick to a palette of two or three colours, repeat materials like wood, brass, and linen, and leave breathing room around every display. Invest your effort in neat finishes — crisp paint edges, tight fabric wrapping, even spacing — because tidy execution is what separates a designer look from a craft project. When in doubt, remove one item.
Bring Your Dream Home to Life, One Project at a Time
You don’t need a renovation budget or professional help to love where you live — as these 16 brilliant home aesthetic DIY ideas show, small creative projects compound into a home that feels truly yours. Start with the one that excited you most, whether that’s a bold painted arch or a simple candle cluster, and enjoy the process as much as the result. We’d love to see what you make: share your before-and-after photos in the comments below, and pin your favourites to try this weekend. For more budget-friendly inspiration, explore our Decor section — your dream home is only a few DIY afternoons away.